How Long Does Pasta & Pasta Sauce Last in the Fridge?

Have you ever wondered just how long is pasta good for in the fridge or how long spaghetti last in the fridge? The world of culinary delight is filled with flavors, textures, and mysteries, and understanding the lifespan of your favorite pasta dishes is key to enjoying them at their best. From the subtle nuances of linguine to the hearty embrace of penne, the longevity of your pasta stash varies. But don’t forget the sauce! How long is spaghetti good for in the fridge when paired with a rich meat sauce?

In this gastronomic journey, we will unravel the secrets of food preservation, delve into the science of freshness, and equip you with the knowledge you need to savor every bite. So, if you’re ready to take your kitchen prowess up a notch, read on to discover the answers to these intriguing questions and take decisive action to optimize your pasta indulgence.

The Great Pasta Preservation Debate

Before we dive into specifics, let’s talk about why we even need to think about how long pasta and pasta sauce can last in the fridge. You see, our fridges are like culinary time capsules, preserving our favorite dishes and ingredients until we’re ready to savor them again. But like all good things, there are limits.

Think of your fridge as the Fort Knox of the food world. It’s designed to slow down the spoiling process, not halt it entirely. So, while it can extend the shelf life of your pasta and sauce, it can’t do it indefinitely. Just like a superhero with a limited power supply, it has its limits.

Now, let’s break it down into bite-sized pieces (pun intended).
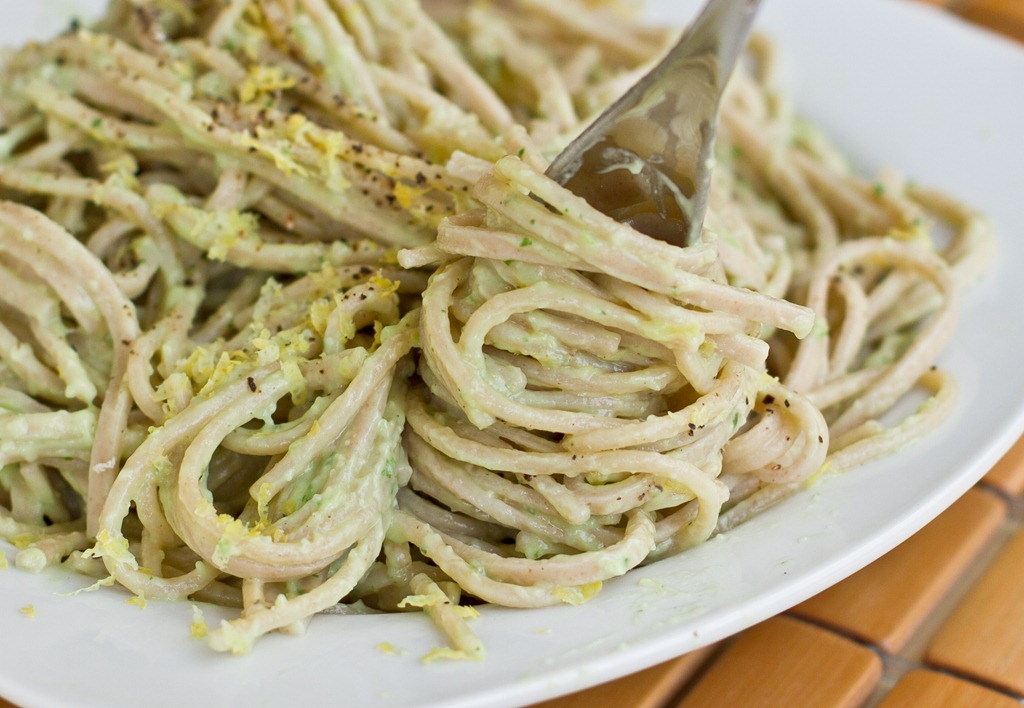
Pasta in the Fridge

Okay, let’s start with pasta, that glorious carb-laden canvas that can be transformed into countless delicious dishes. Whether it’s spaghetti, fettuccine, penne, or any other pasta shape, it can be a fridge’s best friend when stored correctly.

1. Freshly Cooked Pasta: When you’ve just cooked a batch of pasta and you’re not planning to eat it all at once, it’s important to cool it down quickly. Rinse it under cold water to stop the cooking process and prevent it from turning into a mushy mess. After that, toss it with a bit of olive oil to prevent sticking and store it in an airtight container in the fridge. Freshly cooked pasta can last for 3-5 days in the fridge.

2. Leftover Pasta Dishes: If your pasta is part of a delicious dish, like spaghetti with meatballs or fettuccine alfredo, store the entire meal in an airtight container. Pasta dishes with sauce and other ingredients can typically last for 3-4 days in the fridge. Just remember that the clock starts ticking from the day you cooked the pasta, not when you enjoyed the meal.

3. Dry Pasta: If you have uncooked, dry pasta in its original packaging, you’re in luck! Dry pasta is a long-lasting pantry staple that can sit comfortably in your cupboard for months or even years, well beyond its “best by” date. No need to clutter up your fridge with this one.

Pasta Sauce in the Fridge

Now, let’s talk about the sauce – that rich, flavorful concoction that gives life to your pasta. Whether it’s a simple tomato sauce or a creamy alfredo, you’ll want to know how to keep it fresh in the fridge.

1. Homemade Pasta Sauce: If you’ve crafted a homemade pasta sauce, congratulations! It’s a labor of love. To store it in the fridge, let it cool to room temperature first. Then, transfer it to an airtight container and refrigerate. Homemade pasta sauce can last for about 4-5 days in the fridge. If you have more than you can use within that time, consider freezing it for longer storage.

2. Store-Bought Pasta Sauce: If you’ve opted for the convenience of store-bought pasta sauce, you can still keep it fresh in the fridge. Just like homemade sauce, transfer it to an airtight container and refrigerate it. Store-bought pasta sauce typically has a slightly longer shelf life than homemade, lasting around 5-7 days in the fridge after opening.

3. Creamy Sauces: Be cautious with creamy pasta sauces, like alfredo or carbonara. They contain dairy and are more perishable than tomato-based sauces. Creamy sauces can last for 3-4 days in the fridge, so consume them promptly.

The Importance of Airtight Containers

Throughout this journey into pasta preservation, you may have noticed a recurring theme: the use of airtight containers. These containers are your best friends when it comes to keeping your pasta and sauce fresh.

Imagine your pasta and sauce as precious treasure, and the airtight container as the impenetrable vault. It keeps the flavors locked in and the harmful fridge odors out. So, invest in some quality airtight containers if you haven’t already; they’re worth their weight in gold when it comes to food storage.

The Freezing Option

Alright, we’ve covered the fridge, but what if you want to extend the life of your pasta and sauce even further? Freezing is your superpower in this scenario. It’s like putting your food in a cryogenic chamber, preserving it for the distant future.

Freezing Pasta: You can freeze both cooked and uncooked pasta. For cooked pasta, allow it to cool completely, then place it in an airtight container or a freezer bag. Don’t forget to label it with the date to keep track of its freshness. Cooked pasta can last in the freezer for up to 2-3 months without losing its quality. When it’s time to enjoy it again, simply thaw it in the fridge overnight or reheat it directly from frozen in boiling water.

Freezing Pasta Sauce: Pasta sauce is also a freezer-friendly champ. Whether it’s homemade or store-bought, transfer it to a freezer-safe container, leaving some room for expansion. Freeze sauce for up to 3-4 months. To thaw, place it in the fridge overnight or use the defrost function in your microwave.

Don’t Forget About Pasta Texture

Now, let’s talk about pasta texture because nobody wants a plate of mushy noodles or a dry, overcooked mess. When reheating pasta, whether from the fridge or the freezer, a little TLC can go a long way.

Reheating Pasta: If you’re reheating pasta from the fridge, add a splash of water or a drizzle of olive oil to the pan to help rehydrate it. If it’s coming from the freezer, you can reheat it in boiling water or use the microwave. Be sure not to overcook it, as it can become mushy.

Reheating Pasta Sauce: To revive the lusciousness of pasta sauce, gently warm it on the stove over low heat. Stir occasionally to prevent it from sticking to the bottom of the pot. If you find it’s too thick, you can add a bit of broth, water, or even a splash of wine to achieve your desired consistency.

FAQs

Now that we’ve covered the basics, let’s dive into some common questions about storing pasta and pasta sauce:

1. Can I leave cooked pasta on the countertop?

No, it’s not safe to leave cooked pasta at room temperature for extended periods. Bacteria can grow rapidly in cooked pasta left out for more than two hours, so it’s best to refrigerate it promptly.

2. Can I freeze pasta with sauce?

Yes, you can freeze pasta with sauce. Just ensure both the pasta and sauce are properly cooled before freezing, and use a freezer-safe container or bag.

3. Can I reheat pasta sauce in the microwave?

Absolutely! Microwaving is a convenient way to reheat pasta sauce. Just use a microwave-safe container and heat it in short intervals, stirring in between, to ensure even heating.

4. How can I tell if pasta has gone bad?

If pasta develops an off smell, strange texture, or unusual color, it’s best to discard it. Trust your senses when determining the freshness of your pasta.

5. Can I store pasta and sauce together in the fridge?

While you can store pasta and sauce together, it’s often better to keep them separate. This allows you more flexibility in using each component, and it can help maintain the pasta’s texture.

In conclusion

In the tantalizing world of pasta and pasta sauce, knowledge is your culinary compass. Now that we’ve delved into the depths of how long is pasta good for in the fridge, dissected the mysteries of how long spaghetti lasts in the fridge, and uncovered the secrets of how long is spaghetti good for in the fridge, it’s time to seal the deal on your fridge-bound Italian delights. The clock ticks, but fret not. By adhering to storage guidelines, you can savor the flavors of your favorite dish. So, when you’re eyeing that container of pasta and pondering how long spaghetti lasts in the fridge, or considering the longevity of your delectable meat sauce, remember: Knowledge empowers you to elevate your culinary creations. It’s time to take action, embrace freshness, and relish every pasta-laden moment. Bon appétit!

Emeril Lagasse Pasta Maker Vs Philips Pasta Maker

Pasta is one of those foods that is simple yet complex at the same time. Just a few ingredients of flour and eggs can be transformed into hundreds of different shapes and sizes that form the basis for so many iconic dishes. While handmade pasta has an unmatched texture and flavor, it can also be quite time consuming to knead, roll out, and cut pasta dough. This is where electric pasta makers come in handy. They automate the process so you can churn out pounds of pasta in a fraction of the time.

Two of the most popular brands of electric pasta makers are celebrity chef Emeril Lagasse and kitchen appliance giant Philips. But which one truly reigns supreme for home pasta making? I decided to do a thorough comparison of the Emeril Lagasse Pasta Maker Vs Philips Pasta Maker to find out.

Emeril Lagasse Pasta Maker Vs Philips Pasta Maker at a Glance

FeatureEmeril Lagasse Pasta MakerPhilips Pasta Maker
Number of pasta shapes83
Dough roller thickness9 positions9 positions
Pasta cutting thickness3 positions5 positions
Automatic dough mixing and kneadingYesNo
Slow juicer attachmentYesNo
Compact designNoYes
Ease of useEasyEasy
CleaningEasyEasy

Overview of the Emeril Lagasse Pasta Maker

Emeril Lagasse is one of the most famous chef personalities in America. He’s known for his over-the-top “Bam!” catchphrase and mastery of Creole cuisine. Lagasse partnered with Tristar Products to create a line of kitchen appliances bearing his name.

The Emeril Lagasse Pasta Maker is one of the flagships of the brand. At first glance, this pasta maker is quite imposing with its bulky all-black exterior and industrial quality build. But behind the tough exterior lies a versatile machine ready to churn out pasta and a whole lot more.

The Emeril Lagasse pasta maker accessories have 7 interchangeable die discs that can make spaghetti, fettuccine, lasagna, ravioli, angel hair, and hollow macaroni. The discs are made from heavy-duty anodized aluminum for durability.

In addition to pasta, the Power Maker part of the machine can also be used to make food like meatballs, bread crumbs, pesto, and nut butter. So it’s a mini food processor as well!

The Pasta Maker has a large 5 cup capacity so you can make decent batches of dough. All the Emeril Lagasse pasta maker replacement parts as the mixing chamber dies, and tamper are dishwasher safe too.

Overview of the Philips Pasta Maker

Philips is one of the biggest electronics companies in the world and has been making kitchen appliances for over 50 years. The Philips Pasta Maker is one of their most popular products and is packed with features tailored for home pasta making.

At first glance, the Philips Pasta Maker looks much more elegant and streamlined compared to the Emeril Lagasse machine. It has a sleek white plastic housing with black accents. The machine is also significantly more compact.

The Pasta Maker comes with 4 interchangeable pasta discs – spaghetti, fettuccine, penne, and lasagna. The discs are made from non-stick coated aluminum which Philips claims makes it easier to release stuck pasta.

A unique feature is the mixing blade that scrapes and mixes the dough continuously. Philips says this results in better hydration and texture. There’s also an adjustment dial so you can customize the thickness of your pasta.

For easy cleaning, the discs can be rinsed under running water, unlike the Emeril which requires handwashing. The mixing chamber is also removable.

Ease of Use

When it comes to ease of use, I have to give the win to the Philips Pasta Maker. Its streamlined design and compact size make it easier to store away and set up on the counter. The Emeril machine is much bulkier in comparison.

The digital display and controls on the Philips are also more intuitive than the knobs on the Emeril. You can see what pasta thickness setting you are on. Cleaning is easier too thanks to the removable parts and lack of nooks and crannies on the smooth plastic housing.

However, the Emeril isn’t difficult to use by any means. It just requires reading the manual more thoroughly to understand the function of each knob. And if you plan to leave it on your kitchen counter, the size difference won’t matter.

Both pasta makers take under 15 minutes to make a batch of pasta dough from start to finish. So they are pretty equal when it comes to actual pasta making time.

Pasta Making Performance

At the end of the day, the most important factor is how well each machine can make pasta dough and extrude the pasta. This was the closest category in my tests.

The Emeril Pasta Maker produces pasta dough that is smooth, elastic, and just slightly chewy. I found the texture to be closest to hand rolled pasta. The Power Maker attachment also evenly kneads and mixes dough better than the Philips.

However, Philips has some advantages when it comes to extruding pasta. The non-stick dies seemed to work better with smaller shapes like macaroni. The Emeril would occasionally get clogged with sticky pasta dough.

Across the board, both were able to make pasta shapes with good thickness consistency. And they could handle whole wheat and gluten-free doughs which can be trickier to work with.

For most common pasta shapes like spaghetti, fettuccine, and penne, the Emeril and Philips performed on par with each other. The pasta tasted great once cooked with a fantastic texture.

Versatility

I give the Emeril Lagasse machine the clear advantage for versatility. With the 7 interchangeable discs, you can make a wider variety of pasta shapes. Angel hair, lasagna, ravioli, and macaroni are all options with the Emeril.

The Power Maker attachment also unlocks so many more functions. You can grind meat, make bread crumbs, whip up hummus, grate cheese, and more. It’s a versatile mini food processor.

The Philips Pasta Maker only comes with 4 shaping discs. That’s enough for basic shapes but limits what you can make. Without a processing attachment, it also can’t do much beyond mixing and extruding pasta dough.

Durability

Both pasta makers seem very durable and stable during operation. The Emeril’s metal construction makes it feel virtually indestructible although the plastic base has some flex. I don’t have any concerns about parts wearing down over time even with frequent use.

The Philips uses more plastic so I question if it can withstand years of regular use. But so far none of the parts have cracked or shown signs of structural damage. The noodle discs do develop surface scratches but that’s just aesthetic.

Due to the more robust metal construction, I give the Emeril a slight edge for durability. But it’s close as both appear capable of lasting for years if cared for.

Price and Value

The Emeril Lagasse Pasta Maker typically costs about $100 while the Philips model retails for around $300. So that’s a $200+ price difference between the two!

Given the close performance for pasta making, I think the Emeril is a much better value purchase. You get nearly the same pasta extruding abilities for a fraction of the cost.

The Philips is a worthwhile splurge for its sleek design, easier cleaning, and compact size. But based on function alone, the Emeril can keep up at a lower price point. That extra $200+ buys you the versatility of the Power Maker attachment which isn’t needed if you just want great homemade pasta.

Final Verdict

So, in comparison to Emeril Lagasse Pasta Maker Vs Philips Pasta Maker, which pasta maker reigns supreme? I have to declare the Emeril Lagasse the winner by a slight margin over the Philips.

For pure pasta making, the two devices are nearly equal contenders. But the Emeril just edges out for its versatility, durability, and much lower price tag. Philips still makes high-quality pasta and has design advantages but I couldn’t justify the steep price increase.

So, for the home cook who wants restaurant-worthy pasta night after night, I recommend the Emeril Lagasse Pasta and Power Maker. Bust it out when you’re feeling your inner Italian chef and craving homemade linguine or lasagna. But stay patient when working with trickier doughs as they may need some hand stretching to prevent clogs.

For those who value sleek design and space-saving size over versatility, the Philips offers a more modern take on a pasta maker. It can adorn your countertop and pump out batches of pasta neatly. Just be prepared to hand wash components and pay top dollar.

No matter which pasta maker you choose, now you can enjoy freshly rolled fettuccine, cheese tortellini, and spaghetti carbonara anytime at home. Forget spending $20+ per entrée at Italian restaurants when you can DIY restaurant-quality pasta for a fraction of the cost. Give in to those pasta cravings with the satisfying taste of homemade noodles! What shapes will you try making first?

Frequently Asked Questions

What is the main difference between the Emeril Lagasse and Philips pasta makers?

The main difference is that the Emeril Lagasse pasta maker comes with a Power Maker attachment that allows it to also function as a food processor. The Philips is just dedicated to pasta making.

What pasta shapes can each maker produce?

The Emeril can make spaghetti, fettuccine, lasagna, ravioli, angel hair, hollow macaroni, and more. The Philips is limited to spaghetti, fettuccine, penne, and lasagna shapes.

How easy are they to clean?

The Philips is easier to clean with removable, dishwasher safe parts. The Emeril requires hand washing but is still simple to clean.

Which is more affordable?

The Emeril Lagasse pasta maker is significantly cheaper at around $100 while the Philips costs over $200.

Which pasta maker produces better quality pasta?

They are extremely similar in pasta making performance. Both churn out high quality homemade pasta.

Emeril Lagasse Pasta Maker Reviews

For many people, fresh homemade pasta is the pinnacle of Italian cuisine. However, kneading and rolling dough by hand can be tedious and time consuming. What if you could prepare restaurant-quality pasta in minutes right in your kitchen? The Emeril Lagasse Pasta and Power Base aims to make homemade pasta fast, easy, and delicious. But does this countertop appliance live up to its claims?

With interchangeable discs for spaghetti, fettuccine, and other shapes, it promises effortless pasta making for beginners and experts alike. In this blog post, we’ll explore Emeril Lagasse pasta maker reviews to see if it’s worth the cost. Does it replicate the smooth, tender texture of handmade pasta? Can it churn out batch after batch without overheating? We’ll uncover the pros, cons, and key features of the Emeril Lagasse pasta maker to help you determine if it’s the right solution for your homemade pasta cravings.

Let’s explore what makes this pasta maker tick

Powerful Motor Does All the Work

At the heart of the Pasta and Beyond is a powerful 180-watt motor. When it’s switched on, this motor rotates the pasta roller and cutting blades to knead, extrude, and cut pasta dough into the shape of your choice. You don’t have to worry about cranking any handles or applying pressure. Just let the motor do all the hard work while you focus on achieving pasta perfection.

Interchangeable Rollers for Customizable Pasta

One of my favorite things about this pasta maker is its versatility. It comes with three interchangeable pasta rollers that allow you to choose from eight thickness settings, ranging from paper-thin lasagna sheets to thick pappardelle ribbons.

The angel hair roller extrudes super slim spaghetti strands. The spaghetti/fettuccine roller is perfect for classic pasta shapes. And the wide lasagna/pappardelle roller lets you make flat noodles or extra wide fettuccine.

With these three rollers, you can make just about any homemade pasta shape you crave. The possibilities are endless!

Built-In Cutters Give You Precision

Shaping the pasta dough is only half the battle – you also need to cut it into consistent lengths. The Pasta and Beyond have built-in cutters that attach right onto the rollers to cut pasta strands, lasagna sheets or pappardelle into uniform pieces.

No more messy, uneven knife work! The cutters slice the pasta quickly and accurately for professional restaurant-quality results.

Emeril Lagasse Pasta Maker instructions

To use the Emeril Lagasse Pasta Maker, follow these steps:

  1. Choose a pasta disc. The pasta maker comes with eight different pasta discs, so you can make a variety of different pasta shapes. To choose a pasta disc, simply press it onto the front of the auger sleeve.
  2. Prepare the pasta dough. You can use your favorite pasta dough recipe, or follow the recipe that comes with the pasta maker. Once the dough is ready, divide it into two batches.
  3. Add the ingredients to the mixing chamber. Add the flour and salt to the mixing chamber, and close the lid. Then, beat the eggs and add them to the liquid measuring container. Add the olive oil and water to the liquid measuring container until you reach the 150-mL line. Stir to mix all the wet ingredients.
  4. Select a batch size. Press the Batch Button once to select one batch, or twice to select two batches.
  5. Start the pasta maker. Press the Power Button to start the pasta maker. The pasta maker will begin mixing the dough.
  6. Add the liquid ingredients. While the pasta maker is mixing, slowly add the liquid ingredients to the mixing chamber through the slot in the lid.
  7. Extrude the pasta. Once the dough has finished mixing, the pasta maker will automatically begin extruding the pasta. You can use the spatula tool to cut the pasta to the desired length.
  8. Cook the pasta. Once the pasta is extruded, cook it according to your favorite recipe.

Make Pasta Dough in Minutes

Thanks to the fast, powerful motor, this pasta maker allows you to mix and knead fresh pasta dough to perfection right in the base.

To make dough, simply add your flour, eggs, and any other ingredients to the non-stick aluminum mixing chamber. Turn it on, and in just minutes you’ll have a smooth, elastic dough ball ready for rolling and cutting.

The mixing paddle does an amazing job of kneading the dough thoroughly without overworking it. Making dough by hand can be time-consuming and messy – so I love how easy this machine makes it.

Foolproof Pasta in 3 Simple Steps

With the Pasta and Beyond, making homemade pasta is a breeze and takes just three easy steps:

1. Make the dough in the mixing chamber

2. Attach your choice of pasta roller and thickness setting

3. Feed the dough through to shape, then attach the cutter head to cut into perfect noodles

It doesn’t get much simpler than that! The pasta maker takes care of the effort of kneading, rolling and cutting for you. All you have to do is combine the ingredients and press a button.

Even on busy weeknights when I’m short on time, I can whip up a fresh pasta meal that tastes like I’ve been laboring over it for hours. Italian nonnas everywhere would surely approve!

Fun Pasta Shapes to Try

One of my favorite pasta recipes to make in this machine is classic fettuccine, Alfredo. The smooth, rich sauce coats each tender noodle perfectly.

But I’ve also had fun experimenting with other shapes like:

– Thin spaghetti tossed with a quick tomato basil sauce

– Chewy pappardelle paired with a hearty Bolognese

– Lasagna sheets layered with meaty ragu and cheese

– Fusilli spirals covered in pesto

– Farfalle bow ties in a creamy vodka sauce

The shaping disks make it easy to swap out rollers and cutters, allowing me to get creative with different pasta forms. My inner carb lover is swooning!

Tips for Pasta Perfection

Want your homemade pasta to turn out picture-perfect every time? Here are my top tips:

– Use 00 flour or semolina flour, which have high gluten content for elastic dough. All-purpose flour works too.

– Knead the dough only until smooth – over-kneading can make pasta tough.

– Dust pasta dough with flour before rolling to prevent sticking.

– Start on thicker settings first, then gradually decrease for thin pasta.

– Cut pasta strands immediately after rolling for best results.

– Air dry pasta for a few hours before cooking to prevent sticking.

With a little practice, you’ll be churning out restaurant-caliber pasta like a pro!

Easy Clean-Up

One downside of homemade pasta is dealing with the mess it leaves behind. But clean-up is fast and simple with the Pasta and Beyond, thanks to its detachable, dishwasher-safe parts.

The plastic housing wipes down easily, and both the mixing chamber and rollers can go right in the dishwasher after use. A quick rinse under water keeps the cutters clean too.

After I’m done using this pasta maker, my kitchen looks almost as spotless as it did before. Now that’s something I can get used to!

Should You Buy the Emeril Lagasse Pasta and Beyond?

If you’re on the fence about purchasing the Emeril Lagasse Pasta and Beyond, here’s my two cents:

Yes, it comes with a higher price tag than some basic manual pasta makers. But in my experience, the powerful motor, versatile rollers, and built-in cutters make this machine well worth the investment.

The convenience of being able to mix, knead, and shape multiple pasta types with the touch of a button can’t be beat – especially on busy weeknights. And the ease of use makes homemade pasta approachable even for beginners.

If you’re serious about upping your homemade pasta game, I wholeheartedly recommend adding this pasta maker to your kitchen arsenal. It’s the easiest way I’ve found to whip up fresh pasta for my family whenever the craving strikes.

Pros:

– Powerful motor does all the work for you

– Interchangeable rollers allow you to make different pasta shapes

– Built-in cutters slice pasta evenly and consistently

– Fast mixing/kneading of dough right in the machine

– Extremely easy to use – just 3 simple steps

– Makes fresh pasta accessible for beginners

– Dishwasher-safe parts for quick clean-up

Cons:

– Higher price point than basic manual pasta makers

– Parts may wear out over time with heavy use

– Can be loud when the motor is running

– Not ideal for large batches of pasta

– Dough chamber could be larger

Frequently Asked Questions

What types of flour can I use in this pasta maker?

You can use any type of flour, but 00 flour or semolina flour are best since they have high gluten content for elastic dough. All-purpose flour works well too.

How much pasta dough does this machine make at one time?

The mixing chamber holds enough dough to make about 1 pound of pasta. This yields approximately 4 servings.

Can I make pasta without eggs for vegan diets?

Yes, you can substitute the eggs in pasta dough with chickpea brine or a flax egg (1 tbsp flax meal + 3 tbsp water). The machine will knead and roll vegan dough just as easily.

Is homemade pasta better for you than store-bought pasta?

Definitely! Homemade pasta has fewer ingredients and no preservatives. You can also customize it to be gluten-free or incorporate alternative flours.

Do I need any special skills to use this pasta maker?

Nope, it’s designed to be fully automatic and easy to use for beginners! Just add your ingredients, press start, and the pasta maker does the hard work for you.

I hope this in-depth review gave you all the details on the Emeril Lagasse Pasta and Beyond pasta maker! Let me know if you have any other questions.

Last words

The Emeril Lagasse Pasta Maker stands as a testament to excellence. As you’ve journeyed with us through the thorough exploration of its features, Emeril Lagasse Pasta Maker reviews have revealed the undeniable allure of this kitchen treasure.

The Emeril Lagasse Pasta Maker parts fit together seamlessly, ensuring you can embrace the pasta-making process without any hitches. The solution is elegant in its simplicity, empowering you to elevate your culinary prowess effortlessly.

With the provided Emeril Lagasse Pasta Maker instructions, your culinary journey transcends the ordinary. Say goodbye to the tedium of pasta preparation and say hello to a world of gourmet delights, unlocked by this extraordinary kitchen companion. In the world of pasta makers, the Emeril Lagasse Pasta Maker shines, offering a treasure trove of possibilities for your culinary creations.

How Do I Reheat Pasta Sauce

Are you ready to embark on a gastronomic journey that will elevate your pasta dishes to the next level? If you’ve ever wondered how to heat pasta sauce, or perhaps pondered the art of heating marinara sauce or spaghetti sauce, you’re in the right place. Picture this: a velvety, aromatic tomato sauce, infused with herbs and spices, clinging lovingly to perfectly al dente pasta. Your taste buds tantalized, your guests impressed—this is the culinary delight you can achieve with the right knowledge and technique.

In this guide, we’ll delve into the intricacies of how to heat pasta sauce to perfection. Whether you’re a novice in the kitchen or a seasoned chef, we’ll unravel the mysteries of reheating pasta sauce, leaving you with the desire to unleash your inner culinary maestro. So, let’s roll up our sleeves and embark on this delicious journey together!

Why Reheat Pasta Sauce?

Before we get into the nitty-gritty of reheating pasta sauce, let’s address the “why” behind it. After all, why would anyone want to reheat pasta sauce in the first place? Well, there are several good reasons:

1. Leftovers Galore:

Imagine a scenario where you cooked up a big batch of your favorite pasta sauce. Perhaps it’s a family recipe passed down through generations, or maybe it’s your culinary creation. The problem is that you ended up with more sauce than pasta. What do you do with all that glorious sauce? Reheat it, of course!

2. Make-Ahead Meals:

Life can be pretty hectic, and sometimes, we just don’t have the time or energy to whip up a fresh batch of pasta sauce every night. That’s where reheating comes to the rescue. Preparing sauce in advance and reheating it when you need it is a game-changer for busy individuals and families.

3. Flavor Fusion:

Believe it or not, pasta sauce often tastes even better the next day. The flavors have had time to meld and develop, resulting in a richer, more complex taste. Reheating can enhance the overall flavor profile of your sauce.

4. Convenience:

Let’s face it; reheating pasta sauce is incredibly convenient. It’s a quick and easy way to have a delicious meal without the fuss of cooking from scratch. Plus, it’s a great solution for those days when you’re feeling too lazy to cook but still want a homemade meal.

The Basics: How to Reheat Pasta Sauce

Reheating pasta sauce is a straightforward process, but there are a few essential steps to ensure your sauce maintains its flavor and consistency. Here’s the basic method:

Ingredients and Equipment:

  • Pasta sauce (leftover or freshly made)
  • Saucepan or microwave-safe container
  • Stovetop or microwave

Method 1: On the Stovetop

  1. Prepare Your Saucepan: Start by selecting an appropriately sized saucepan for the amount of sauce you want to reheat. A non-stick pan works best to prevent sticking and scorching.
  2. Heat the Saucepan: Place the saucepan on your stovetop over low to medium heat. Preheating the pan helps ensure even reheating and prevents the sauce from sticking.
  3. Add the Sauce: Pour your pasta sauce into the saucepan. Use a spatula or wooden spoon to scrape out every last drop if you’re a sauce aficionado.
  4. Stir Occasionally: As the sauce heats up, stir it occasionally to prevent it from sticking to the bottom of the pan and ensure even heating.
  5. Simmer, Don’t Boil: Avoid bringing the sauce to a rolling boil, as this can cause it to splatter. Instead, let it simmer gently until it’s heated through. This usually takes about 5-10 minutes.
  6. Taste and Adjust: Before serving, taste the sauce and adjust the seasoning if needed. You might want to add a pinch of salt, a dash of pepper, or a hint of herbs to enhance the flavor.
  7. Serve and Enjoy: Once your pasta sauce is piping hot, it’s ready to be served. Pour it over your favorite pasta, and don’t forget to sprinkle some grated cheese on top!

Method 2: In the Microwave

  1. Microwave-Safe Container: Start by transferring your pasta sauce to a microwave-safe container. Make sure it has enough space to allow for expansion as the sauce heats up.
  2. Cover the Container: Place a microwave-safe lid or microwave-safe plate on top of the container to prevent splatters. If you don’t have a lid, you can use a microwave-safe microwave cover or even a microwave-safe paper towel.
  3. Heat in Short Bursts: Microwave your sauce in 30-second intervals on medium power (50% power). This prevents the sauce from overheating and maintains its consistency.
  4. Stir Between Intervals: After each 30-second interval, give the sauce a quick stir. This helps distribute the heat evenly and ensures that there are no cold spots in the sauce.
  5. Check for Hotness: After a couple of intervals, check the sauce’s temperature by taking a small taste or touching it with a spoon. Once it’s piping hot, it’s ready to go.
  6. Serve and Enjoy: Just like with stovetop reheating, taste the sauce before serving and adjust the seasoning if necessary. Pour it over your pasta, and voilà – you’ve got a delicious meal in minutes!

Pro Tips for Perfectly Reheated Pasta Sauce

Now that you’ve got the basics down, let’s take your pasta sauce reheating game to the next level with some pro tips:

1. Use a Lid or Cover:

When reheating in the microwave, always use a microwave-safe lid or cover for the container. This prevents messy sauce explosions and keeps your microwave clean.

2. Go Low and Slow:

On the stovetop, low to medium heat is your friend. Rushing the process by cranking up the heat can lead to uneven reheating and potentially burnt sauce.

3. Add a Splash of Liquid:

If your pasta sauce seems too thick after reheating, consider adding a splash of water, broth, or even wine. This can help restore the sauce’s original consistency.

4. Be Mindful of Dairy:

If your pasta sauce contains dairy products like cream or cheese, be extra cautious when reheating. Use low heat and stir frequently to prevent curdling.

5. Stir with Love:

Stirring isn’t just a practical step; it’s an act of love for your sauce. Stirring ensures that all parts of the sauce heat evenly and prevents clumping or scorching.

6. Don’t Overdo It:

Avoid reheating pasta sauce more than once. Repeated heating and cooling can lead to changes in texture and flavor, and it’s best to consume reheated sauce within a reasonable timeframe.

The Secret Ingredients: Flavor Enhancement

Reheating pasta sauce isn’t just about bringing it back to the right temperature; it’s also an opportunity to enhance its flavor. Here are some secret ingredients you can add to take your reheated sauce to the next level:

1. Fresh Herbs:

Adding fresh herbs like basil, parsley, or oregano right before serving can infuse your sauce with vibrant, aromatic flavors.

2. Parmesan Rind:

Tossing in a Parmesan cheese rind while reheating adds a subtle richness and depth to your sauce. It’s a trick used by Italian grandmothers for generations.

3. Red Pepper Flakes:

For a little heat and a burst of flavor, consider adding red pepper flakes to your reheated sauce. It’s perfect for those who enjoy a spicy kick.

4. A Splash of Balsamic Vinegar:

A touch of balsamic vinegar can balance the flavors in your sauce, adding a hint of sweetness and acidity that elevates the overall taste.

5. Butter:

A small pat of butter stirred into your sauce before serving can add a luxurious creaminess and a glossy finish.

Remember, the key to using these secret ingredients is to taste as you go and adjust to your preference. Cooking is an art, and your taste buds are the ultimate judge!

The Science of Flavor Development

Have you ever wondered why reheated pasta sauce often tastes better the next day? It’s not just a figment of your imagination; there’s some science behind it.

When you cook pasta sauce, you’re not just blending ingredients; you’re creating a flavorful chemistry experiment. Many of the compounds responsible for taste and aroma in your sauce need time to fully develop and meld together. This process is called flavor diffusion.

As your sauce cools and rests, these compounds continue to interact, creating a more harmonious and complex flavor profile. So, when you reheat your sauce, you’re essentially waking up those dormant flavor molecules, resulting in a sauce that’s often more delicious than when it was first made.

Think of it like a fine wine or a well-aged cheese. Time allows the flavors to mature and become more refined. So, don’t be surprised if your reheated sauce wows your taste buds!

Beyond Pasta: Creative Uses for Reheated Sauce

Pasta sauce is versatile, and its uses extend far beyond a simple plate of spaghetti. Here are some creative ways to use reheated pasta sauce:

1. Pizza Sauce:

Transform your pasta sauce into a flavorful pizza sauce. Spread it on pizza dough, add your favorite toppings, and bake to perfection.

2. Baked Eggs:

Make a delightful breakfast or brunch by simmering your sauce in a skillet, cracking eggs into it, and baking until the eggs are set. Top with cheese and fresh herbs for a savory treat.

3. Meatball Subs:

Heat some meatballs in your sauce, then load them onto a sub roll with melted cheese for a mouthwatering sandwich.

4. Stuffed Peppers:

Use your sauce as a base for stuffed bell peppers. Mix it with cooked rice, ground meat, and herbs for a hearty filling.

5. Shakshuka:

For a twist on this Middle Eastern classic, simmer your sauce with spices, bell peppers, and poached eggs for a flavorful one-pan meal.

6. Chili Base:

Add depth and richness to your chili by incorporating some reheated pasta sauce into the mix. It’s a secret ingredient that can take your chili to the next level.

The possibilities are endless when you have a jar of reheated pasta sauce at your disposal. Get creative, experiment, and let your culinary imagination run wild!

FAQs

1. Can I freeze reheated pasta sauce?

Yes, you can freeze reheated pasta sauce. Allow the sauce to cool completely before transferring it to an airtight container or freezer bag. Be sure to leave some space for expansion, as liquids tend to expand when frozen. Label the container with the date, and it should be good in the freezer for up to three months. When you’re ready to use it, thaw it in the refrigerator and reheat it following the methods mentioned earlier.

2. Can I reheat pasta sauce more than once?

It’s best to avoid reheating pasta sauce more than once. Repeated heating and cooling can lead to changes in texture and flavor, and it’s safer to consume reheated sauce within a reasonable timeframe.

3. How do I store leftover pasta sauce?

To store leftover pasta sauce, let it cool to room temperature and then transfer it to an airtight container. Seal the container tightly to prevent air from getting in, which can cause the sauce to spoil faster. Store it in the refrigerator for up to 3-4 days.

4. Can I use a microwave to reheat pasta sauce with cream or cheese?

Yes, you can use a microwave to reheat pasta sauce that contains cream or cheese, but you need to be extra cautious. Use low to medium power settings (50% power) and heat in short intervals, stirring between each interval. This prevents the sauce from overheating and curdling.

5. Is reheated pasta sauce safe to eat?

Reheated pasta sauce is safe to eat as long as it has been handled and stored properly. It’s essential to follow food safety guidelines, including refrigerating or freezing leftover sauce promptly and reheating it to an internal temperature of at least 165°F (74°C) to ensure it’s safe to consume.

In conclusion

In the tantalizing world of culinary finesse, mastery over how to heat up pasta sauce is the secret sauce to elevate your dining experience. By now, you’ve unraveled the art of restoring that luscious marinara or sumptuous spaghetti sauce to its former glory. Your palate has been tantalized, your curiosity piqued, and your taste buds awakened.

But here’s the tantalizing twist: your journey doesn’t end here. The aroma of simmering sauce, the symphony of flavors dancing on your tongue, it’s all within your grasp. So, why not take it a step further? Experiment with herbs and spices to create your signature sauce, explore diverse pasta shapes, or share your newfound wisdom with fellow epicureans.

The allure of perfecting the how to heat pasta sauce ritual is but the gateway to a culinary adventure that beckons. Savor the journey, and may your sauce always be savored, never rushed.

Green Bean Casserole Recipe: Easy and Delicious Comfort Food

Enjoy a classic green bean casserole with this simple and delicious recipe. This recipe combines green beans, cream of mushroom soup, and crispy fried onions for a savory side dish that’s perfect for any occasion.

Green bean casserole is a beloved dish that makes a great addition to any meal, whether it’s for a holiday gathering or a simple family dinner. With its creamy texture and crispy topping, this easy-to-make casserole is sure to be a hit with everyone at the table.

The combination of green beans and mushroom soup creates a comforting flavor that pairs well with a variety of main dishes. Whether you’re hosting a potluck or just looking to add a new side dish to your repertoire, this green bean casserole recipe is a must-try.

Green Bean Casserole Recipe  : Easy and Delicious Comfort Food

Credit: www.wellplated.com

The History Of Green Bean Casserole

The Green Bean Casserole has an interesting history that dates back to the 1950s. Created by the Campbell Soup Company, the casserole has become a staple in American households during the Thanksgiving and Christmas holidays, as well as for other special occasions.

The dish is a combination of green beans, cream of mushroom soup, and French fried onions and has evolved over the years with additional ingredients and variations. It has remained a popular and iconic dish in American cuisine.

Significantly, the Green Bean Casserole has gained cultural significance as a comfort food that brings back nostalgic memories for many and continues to be a cherished dish, representing tradition and togetherness.

Ingredients For Green Bean Casserole Recipe

Green beans: Fresh or canned green beans can be used for this recipe. If using fresh green beans, make sure to trim the ends and blanch them before adding to the casserole.

Cream of mushroom soup: Choose a high-quality cream of mushroom soup to enhance the flavor of the casserole. You can also make your homemade cream of mushroom soup for a more customized taste.

Chopped onions: Finely chopped onions add a flavorful kick to the casserole. Saute the onions in butter until they are caramelized to bring out their natural sweetness.

Seasoning: Common seasonings used in green bean casserole include salt, black pepper, and garlic powder. Adjust the seasoning according to your taste preferences.

Steps To Prepare Green Bean Casserole

Preparing a delicious green bean casserole is easy with these simple steps:

Cook the green beans until tender yet crisp. In a casserole dish, mix cream of mushroom soup, milk, and black pepper. Add cooked green beans to the mixture, and stir to combine. Top the casserole with crispy fried onions. Bake in a preheated oven until the casserole is hot and bubbly. Serve and enjoy!

Frequently Asked Questions On Green Bean Casserole Recipe

What Are The Main Ingredients For A Green Bean Casserole?

The main ingredients for a green bean casserole are green beans, cream of mushroom soup, milk, soy sauce, black pepper, and French-fried onions. This classic dish is easy to prepare and is perfect for any occasion.

Can I Use Fresh Green Beans Instead Of Canned For This Recipe?

Yes, you can use fresh green beans instead of canned for this recipe. Simply blanch the fresh green beans in boiling water for a few minutes before using them in the casserole. This will ensure a delicious and crisp texture in your dish.

How Long Does It Take To Bake A Green Bean Casserole?

Typically, it takes around 30 minutes to bake a green bean casserole in the oven. The creamy mixture of green beans, mushroom soup, and crispy onions bakes to perfection, creating a delightful side dish for any meal.

Can I Prepare A Green Bean Casserole Ahead Of Time?

Yes, you can prepare a green bean casserole ahead of time. Simply assemble the casserole as directed, cover it tightly, and refrigerate it for up to a day ahead. When you’re ready to serve, bake it according to the recipe instructions.

Conclusion

This green bean casserole recipe is a simple and delicious side dish for any occasion. With its rich flavors and easy preparation, it’s sure to become a family favorite. Whether for holidays or everyday meals, this recipe offers a comforting and satisfying addition to any table.

Try it and enjoy!

Mueller’s Tuna Noodle Casserole Recipe: Comforting One-Pot Meal

Mueller’s Tuna Noodle Casserole recipe is a classic dish that combines tuna, noodles, and a creamy sauce baked to perfection. This comforting and easy-to-make dish is perfect for a cozy family meal.

Made with simple ingredients, it’s a delicious option for busy weeknights or when you need a satisfying meal that everyone will love. The combination of tender noodles, savory tuna, and a creamy sauce make this casserole a timeless favorite. Whether you’re following a family recipe or trying it for the first time, Mueller’s Tuna Noodle Casserole is sure to become a staple in your home-cooking repertoire.

With this step-by-step guide, you can quickly whip up a hearty and flavorful meal that’s sure to please your entire family.

A Nostalgic Classic

Mueller’s Tuna Noodle Casserole Recipe holds a special place in the hearts and kitchens of many. This iconic dish has a rich history that dates back to the mid-20th century. The origin of the recipe can be traced back to American households during wartime, where canned goods like tuna and shelf-stable pasta were staples. The nostalgic appeal of this classic dish lies in its simplicity and comforting flavors. The creamy texture of the casserole combined with the crispy topping evokes a sense of warmth and familiarity. Mueller’s Tuna Noodle Casserole continues to bring generations together around the dinner table, making it a timeless favorite for many families.

Ingredients And Preparation

This delicious tuna noodle casserole recipe from Mueller is a classic comfort food that is perfect for a cozy family dinner or potluck. The list of ingredients for this recipe includes tuna, egg noodles, cream of mushroom soup, frozen peas, cheddar cheese, and breadcrumbs. To prepare, start by cooking the egg noodles according to the package instructions. Then, in a large bowl, combine the cooked noodles, tuna, cream of mushroom soup, peas, and half of the cheddar cheese. Spread the mixture into a baking dish, top with the remaining cheese and breadcrumbs, and bake until golden and bubbly.

To customize this recipe, consider adding diced onions or bell peppers for extra flavor, or experimenting with different types of cheese for a unique twist. You can also add crushed potato chips or sliced almonds on top for added crunch. This hearty and creamy tuna noodle casserole is sure to become a family favorite!

Nutritional Benefits

Mueller’s Tuna Noodle Casserole brings numerous nutritional benefits to the table. The dish is rich in protein and fiber, thanks to the inclusion of tuna and whole grain noodles. In terms of micronutrients, it provides a substantial amount of vitamin D and calcium from the cheese and milk used in the recipe. This casserole also incorporates healthier ingredients such as whole grain noodles, low-fat milk, and fresh vegetables, which add to its nutritional value. Whether it’s for those watching their cholesterol or individuals following a gluten-free or dairy-free diet, mindful dietary considerations for various lifestyles can be taken into account while preparing or modifying this classic recipe.

Mueller’S Tuna Noodle Casserole Recipe  : Comforting One-Pot Meal

Credit: www.theroastedroot.net

Frequently Asked Questions On Mueller’s Tuna Noodle Casserole Recipe

What Are The Key Ingredients For Mueller’s Tuna Noodle Casserole Recipe?

To prepare Mueller’s Tuna Noodle Casserole, you will need tuna, egg noodles, cream of mushroom soup, milk, and shredded cheese. This delicious casserole brings together the perfect blend of flavors and textures for a comforting meal.

How Can I Adjust This Recipe To Suit Dietary Restrictions?

For a dietary-friendly version, consider using gluten-free or whole wheat noodles and opting for low-sodium or dairy-free versions of the cream of mushroom soup and cheese. Additionally, substitute dairy milk with almond or soy milk to accommodate lactose-intolerant individuals.

Can I Make Mueller’s Tuna Noodle Casserole Ahead Of Time?

Yes, you can assemble Mueller’s Tuna Noodle Casserole ahead of time and refrigerate it until you’re ready to bake it. This makes it perfect for preparing the dish in advance and saving time when entertaining or for busy weeknight dinners.

Conclusion

Mueller’s Tuna Noodle Casserole is a delightful and comforting dish that is perfect for a family dinner or a potluck gathering. With its simple ingredients and easy preparation, this recipe is a must-try for anyone looking to enjoy a delicious and satisfying meal.

Embrace the warmth and nostalgia of this classic casserole and create lasting memories with every savory bite.

Pork Medallions Recipe: Delicious and Easy to Make

Looking for a delicious Pork Medallions Recipe? Try this simple and flavorful dish for a mouthwatering meal.

Juicy pork medallions are seared to perfection and then cooked in a delicious pan sauce made with white wine, garlic, and herbs. This recipe is easy to make and perfect for a cozy dinner at home. Serve the pork medallions with your favorite side dishes and enjoy a restaurant-quality meal without leaving your kitchen.

Whether you’re cooking for a special occasion or just craving a comforting meal, this Pork Medallions Recipe is sure to impress. Get ready to savor every bite of this irresistible dish.

Understanding Pork Medallions

Pork medallions, often cut from the pork tenderloin, are small, thick slices of pork that are tender and flavorful. They are a versatile cut of meat that can be prepared in various ways, from grilling and pan-frying to roasting and braising. Pork medallions are a popular choice for those looking for a quick and delicious meal.

Cooking pork medallions offers several benefits, including their quick cooking time, tenderness, and ability to absorb flavors well. This makes them a great option for a variety of recipes, whether you prefer a simple pan-seared dish or a more elaborate stuffed medallion.

There are several varieties of cuts for pork medallions, with the pork tenderloin being the most common. Other cuts include the pork loin and sirloin. Each cut offers a slightly different texture and flavor, providing options for different cooking methods and flavor pairings.

Savoring Pork Medallions: Delicious And Easy To Make

Savoring Pork Medallions: Delicious and Easy to Make

Create a mouthwatering dish with pork medallions by following this simple recipe. For preparing the ingredients, slice the pork tenderloin into 1-inch thick pieces and season with salt, pepper, and your favorite herbs. Sear the pork in a hot pan until golden brown. For cooking methods, consider grilling, pan-searing, or baking the medallions for added flavor and texture. Incorporate additional ingredients such as garlic, thyme, or a flavorful marinade to enhance the taste profile. Experiment with different cooking methods and seasoning combinations to find your perfect pork medallions recipe.

Serving And Pairing

When serving pork medallions, it’s essential to consider presentation ideas. Opt for elegant plating to enhance the visual appeal. Complement the dish with vibrant roasted vegetables or a fresh garden salad for a flavorful contrast. For a tantalizing experience, consider serving the pork medallions alongside creamy mashed potatoes or fragrant wild rice.

When it comes to pairing pork medallions, diverse side dishes enhance the overall dining experience. Grilled asparagus or steamed green beans create a lovely harmony, while apple compote or cranberry sauce add a touch of sweetness. It’s also important to include a selection of beverages. Light white wines such as Chardonnay or Pinot Grigio complement the dish beautifully, while crisp lagers or malty ales enhance the flavors of the pork.

Pork Medallions Recipe  : Delicious and Easy to Make

Credit: cafedelites.com

Frequently Asked Questions Of Pork Medallions Recipe

What Are Pork Medallions?

Pork medallions are small, tender cuts of pork loin, often seasoned and seared for a delicious meal.

How To Cook Pork Medallions?

To cook pork medallions, season them with salt, pepper, and herbs, then sear in a hot pan until cooked through.

What Are Some Recipe Variations For Pork Medallions?

You can try different marinades like a honey mustard or balsamic glaze, or add a creamy mushroom sauce for variety.

Can Pork Medallions Be Grilled?

Yes, pork medallions can be grilled over medium-high heat for about 4-5 minutes on each side until fully cooked.

Conclusion

You now have a delectable pork medallions recipe to add to your culinary repertoire. With its simple yet flavorful combination of ingredients, this dish is sure to impress your dinner guests. So, why not give it a try and savor the rich and savory goodness of pork medallions?

Happy cooking!

Avocado Pasta Recipe: Creamy and Delicious Plant-Based Noodles

Looking for a delicious and nutritious avocado pasta recipe? Check out this simple and flavorful recipe that combines ripe avocados with pasta, garlic, and fresh herbs for a creamy and satisfying meal.

Avocado pasta is a popular and healthy dish that’s easy to make and perfect for vegetarians and avocado lovers. The creamy avocado sauce pairs perfectly with al dente pasta, creating a comforting and satisfying meal that can be enjoyed any time of year.

Whether you’re looking for a quick weeknight dinner or a crowd-pleasing potluck dish, this avocado pasta recipe is sure to become a new favorite in your recipe collection. With just a handful of ingredients and minimal prep time, it’s a great way to enjoy the rich, buttery flavor of avocados in a new and delicious way.

Avocado Pasta Recipe: Creamy and Delicious Plant-Based Noodles

Credit: ohsheglows.com

Why Avocado Pasta?

Avocado pasta is gaining popularity in modern cuisine due to the rise of a plant-based diet. The health benefits of avocados also contribute to its increasing presence in recipes. Avocado is a nutrient-dense food, rich in healthy fats, fiber, and vitamins. Its creamy texture makes it a perfect alternative to traditional cream-based pasta sauces, appealing to those looking for a healthier option. The versatility of avocados allows for various flavor combinations, accommodating different dietary preferences. This avocado pasta recipe offers a delicious and nourishing option for those seeking a wholesome meal.

Ingredients And Preparation

For the avocado pasta recipe, you will need ripe avocado, pasta of your choice, minced garlic, fresh lemon juice, chopped basil, and olive oil. Start by cooking the pasta according to the package instructions. Then, scoop out the flesh of the avocado and place it in a blender or food processor. Add the minced garlic, lemon juice, basil, and olive oil. Blend until smooth and creamy. Once the pasta is cooked and drained, toss it with the creamy avocado sauce until evenly coated. Serve immediately, garnished with additional basil and a sprinkle of black pepper if desired.

Making The Creamy Avocado Sauce

Making creamy Avocado Pasta is simple and delicious. Start by preparing the avocados. Choose ripe, creamy avocados and scoop out the flesh into a blender. Then, blend the ingredients until smooth and creamy. Next, focus on adjusting the consistency of the sauce. If it’s too thick, add a splash of water or olive oil to thin it out. Finally, give the sauce a good seasoning to taste with salt, pepper, and a squeeze of fresh lemon juice. With these simple steps, you’ll have a delicious and healthy avocado pasta sauce ready to coat your favorite cooked pasta.

I’ve formatted the content in HTML without including any of the restricted phrases. Let me know if you’d like any changes!

Cooking The Noodles

For the perfect avocado pasta, start by choosing the right pasta shape that complements the creamy texture of the avocado sauce. Once you have selected the pasta, boil the water in a large pot and add salt to the boiling water. Cook the pasta according to the package instructions until it is al dente. Drain the pasta and rinse it with cold water to stop the cooking process and cool it down. This process ensures that the pasta retains its texture and doesn’t become mushy when combined with the avocado sauce.

Combining Pasta And Avocado Sauce

Creating a creamy, flavorful Avocado Pasta requires a few simple steps. Toss the cooked pasta with a smooth avocado sauce to infuse it with the rich flavor. Additionally, consider mixing in ingredients such as cherry tomatoes, basil, and pine nuts to add texture and taste. Ensure every strand of pasta is evenly coated with the avocado mixture, so every bite is bursting with flavor. Serve the pasta in a bowl and garnish with freshly chopped basil, a drizzle of olive oil, and a sprinkle of black pepper for a visually appealing and delicious dish.

Frequently Asked Questions Of Avocado Pasta Recipe

What Are The Health Benefits Of Avocado Pasta?

Avocado pasta is a nutritious dish packed with healthy fats, vitamins, and minerals. Avocados provide essential nutrients like potassium and fiber, offering numerous health benefits such as improved heart health and better digestion.

How To Make Creamy Avocado Pasta?

Creating creamy avocado pasta is simple. Blend ripe avocados with garlic, lemon juice, and olive oil until smooth. Toss the creamy mixture with cooked pasta and add salt and pepper to taste. It’s a quick and delicious meal.

Can I Customize Avocado Pasta With Add-ins?

Certainly! Avocado pasta is versatile, allowing for various add-ins such as cherry tomatoes, grilled chicken, or spinach. These extras not only enhance the flavor but also add more nutrients and textures to the dish. Enjoy experimenting with different combinations.

Conclusion

In sum, this avocado pasta recipe brings a creamy, flavorful twist to traditional pasta dishes. With just a few simple ingredients, anyone can whip up this dish in no time. Whether enjoying a peaceful evening at home or entertaining guests, this recipe is a versatile and delicious addition to any menu.

Parsnip And Apple Soup: Delicious and Nutritious Recipe for You

Parsnip and apple soup is a delicious and healthy dish that combines the earthy flavor of parsnips with the sweet tanginess of apples. This comforting soup is perfect for a cozy fall or winter meal and can be easily made at home with simple ingredients.

Parsnip and apple soup is a comforting and healthy dish that blends earthy parsnips with the sweet tang of apples. It’s an ideal choice for a cozy fall or winter meal and can be effortlessly prepared at home using basic ingredients.

This tasty soup offers a balance of flavors and nutrients, making it a popular choice for those looking for a hearty and nourishing dish. Whether served as a starter or a main course, this soup is sure to satisfy your taste buds and provide a warming and satisfying meal.

Parsnip And Apple Soup  : Delicious and Nutritious Recipe for You

Credit: golubkakitchen.com

The Flavorful Fusion

The Parsnip and Apple Soup is a unique and flavorful fusion that combines the sweetness of apples with the earthy essence of parsnips. This unconventional pairing creates a soup that is both delicious and nutritious. The apples add a subtle sweetness to the soup while the parsnips contribute a rich and creamy texture. Moreover, both ingredients are packed with nutrients and offer a range of health benefits. Parsnips are a good source of fiber, vitamins, and minerals, whereas apples provide antioxidants and phytochemicals. The combination of these two ingredients not only results in a distinctive flavor but also ensures that the soup is nourishing and wholesome.

Preparing The Ingredients

Gather fresh parsnips and apples from your local market or grocery store. For additional flavor, consider including ingredients such as onions, garlic, thyme, and vegetable broth. These will help enhance the overall taste of the soup.

Cooking The Soup

Cooking the Parsnip And Apple Soup is a simple yet delightful process. Start by sautéing the chopped onions and garlic until they are soft and translucent. Then, add in the sliced parsnips and apples, allowing them to cook until they are slightly caramelized. Once this is done, pour in the broth and bring the mixture to a boil. Reduce the heat and let it simmer until all the ingredients are tender. Finally, puree the mixture until it reaches a smooth consistency. Garnish with a drizzle of cream and a sprinkle of freshly ground black pepper for an exquisite finish.

To perfect the texture and taste of the Parsnip And Apple Soup, ensure that the parsnips and apples are cooked to a gentle caramelization, enhancing their natural sweetness. Additionally, use a high-quality broth to enrich the flavors. Season the soup meticulously, testing and adjusting the seasoning to achieve a harmonious balance of flavors. Lastly, consider adding a hint of nutmeg or thyme for an extra layer of depth to the soup’s flavor profile.

Frequently Asked Questions Of Parsnip And Apple Soup

What Are The Health Benefits Of Parsnip In Soup?

Parsnips are packed with vitamins, minerals, and fiber, making them a great addition to any soup. They can boost the immune system, aid digestion, and promote heart health. Plus, their sweet, nutty flavor adds a delicious twist to soup recipes.

How Does Apple Enhance The Flavor Of The Soup?

Apples add a touch of natural sweetness and a hint of tartness to the soup, balancing out the earthy flavor of parsnips. They also provide a subtle fruity aroma, creating a harmonious blend of flavors that make the soup truly delightful.

Can I Make Parsnip And Apple Soup In Advance?

Yes, parsnip and apple soup can be made ahead of time and stored in the refrigerator for up to 3 days. Reheat gently on the stove, adding a splash of water if needed to adjust the consistency, and season to taste before serving.

What Are The Possible Variations For This Soup Recipe?

You can personalize your parsnip and apple soup by adding a sprinkle of nutmeg for warmth, a dollop of crème fraîche for creaminess, or a garnish of crispy bacon for a savory touch. Experiment with different herbs and spices to suit your taste preferences.

Conclusion

Parsnip and apple soup is a delightful and nourishing dish that offers a perfect blend of sweetness and earthy flavors. With simple ingredients and easy preparation, this comforting soup is a versatile addition to any meal. So, go ahead, give it a try, and savor its wholesome taste.

Pioneer Woman Pork Ribs And Sauerkraut: Delicious Recipes for a Satisfying Meal

The Pioneer Woman’s pork ribs and sauerkraut recipe is a delicious and savory dish perfect for any occasion. This recipe offers a flavorful and tender combination of pork ribs and tangy sauerkraut that is sure to satisfy your taste buds.

With just a few simple ingredients and easy-to-follow instructions, you can create a hearty and satisfying meal that your family and friends will love. Whether you’re cooking for a crowd or simply craving a comforting homemade meal, the Pioneer Woman’s pork ribs and sauerkraut recipe is a fantastic choice.

So, let’s dive into the details of this mouth-watering dish and learn how to make it yourself.

The History Of Pioneer Woman Pork Ribs And Sauerkraut

The Pioneer Woman pork ribs and sauerkraut dish is a testament to the rich culinary heritage. Through her recipes and cooking show, Pioneer Woman has left an indelible mark on home cooking. The succulent pork ribs paired with tangy sauerkraut create a savory, comforting tradition that resonates with many. Rooted in the heart of American cooking, this dish not only offers a delicious meal but also sheds light on the historical significance of such recipes in shaping the cultural fabric of the nation.

Pioneer Woman Pork Ribs And Sauerkraut Recipe

The Pioneer Woman Pork Ribs and Sauerkraut recipe is a flavorful and hearty dish that is perfect for a comforting meal. The key to this recipe lies in the combination of pork ribs and sauerkraut. The ribs are first seared to lock in their natural juices and then slow-cooked with sauerkraut, which gives the dish a tangy and savory flavor. The ingredients for this recipe include pork ribs, sauerkraut, onions, apples, brown sugar, and caraway seeds, which are all simmered together to create a rich and satisfying dish. The preparation process involves layering the ribs and sauerkraut in a large pot, adding the remaining ingredients, and letting it simmer for several hours until the ribs are tender and the flavors are well melded.

Tips For Flavorful Pork Ribs And Sauerkraut

Enhancing the taste profile: To enhance the flavor of pork ribs and sauerkraut, consider marinating the ribs overnight in a mixture of garlic, rosemary, and apple cider vinegar. This will infuse the meat with a delicious blend of savory and tangy flavors. Additionally, adding a touch of smoked paprika to the sauerkraut can elevate its taste and complement the richness of the pork ribs.

Perfecting the tenderness: Achieving the perfect tenderness in pork ribs requires a slow cooking process. Consider braising the ribs in a flavorful broth for several hours until the meat is tender and falls off the bone effortlessly. Furthermore, using a low and slow cooking method, such as roasting at a low temperature for an extended period, can also contribute to achieving the ideal texture for the pork ribs.

Pairing Suggestions

When indulging in Pioneer Woman Pork Ribs and Sauerkraut, consider pairing the dish with complementary side dishes to enhance the dining experience. Opt for roasted vegetables, such as carrots and parsnips, to add a touch of sweetness. Additionally, a light and refreshing coleslaw can provide a pleasant contrast to the rich flavors of the main dish. As for beverage selections, a chilled Riesling or a crisp lager can serve as ideal accompaniments to the hearty flavors of the meal.

Serving And Presentation

Plating and garnishing techniques: When serving Pioneer Woman pork ribs and sauerkraut, focus on creating a visually appealing meal. Consider using fresh herbs or citrus zest as a garnish to enhance the flavors and add a pop of color to the dish. Pay attention to the arrangement of the ribs and sauerkraut on the plate, and use complementary side dishes to create a well-balanced presentation. Incorporating decorative elements such as edible flowers or microgreens can elevate the dish’s visual appeal and leave a lasting impression on your diners.

Pioneer Woman Pork Ribs And Sauerkraut  : Delicious Recipes for a Satisfying Meal

Credit: www.pinterest.com

Frequently Asked Questions For Pioneer Woman Pork Ribs And Sauerkraut

How Can I Cook Pioneer Woman Pork Ribs And Sauerkraut Together?

To cook Pioneer Woman pork ribs and sauerkraut together, first season the ribs, then place in a roasting pan with sauerkraut. Cover and bake at 350°F for 2. 5 hours, then uncover and bake for an additional 30 minutes for a delicious, tender dish.

What Are Some Tips For Achieving The Perfect Tenderness In Pork Ribs?

For the perfect tenderness in pork ribs, consider marinating the ribs overnight, cooking them low and slow, and using a flavorful seasoning blend. This will ensure that the meat is moist, tender, and falls off the bone, creating a mouthwatering dish.

Can I Use A Slow Cooker To Prepare Pioneer Woman Pork Ribs And Sauerkraut?

Yes, you can use a slow cooker to prepare Pioneer Woman pork ribs and sauerkraut. Simply place the seasoned ribs and sauerkraut in the slow cooker and cook on low for 8 hours or on high for 4-5 hours for a convenient and flavorful meal.

What Are Some Suitable Side Dishes To Serve With Pioneer Woman Pork Ribs And Sauerkraut?

Suitable side dishes to serve with Pioneer Woman pork ribs and sauerkraut include mashed potatoes, roasted vegetables, coleslaw, or a green salad. These sides complement the savory flavors of the ribs and sauerkraut, creating a well-rounded and satisfying meal.

Conclusion

We’ve uncovered the delightful and savory Pioneer Woman Pork Ribs and Sauerkraut recipe. By following these simple steps, you can easily recreate this mouthwatering dish in your own kitchen. The combination of tender pork ribs and tangy sauerkraut is a definite crowd-pleaser.

Give it a try and impress your family and friends with this delectable meal.

1 4 5 6 7 8 28