
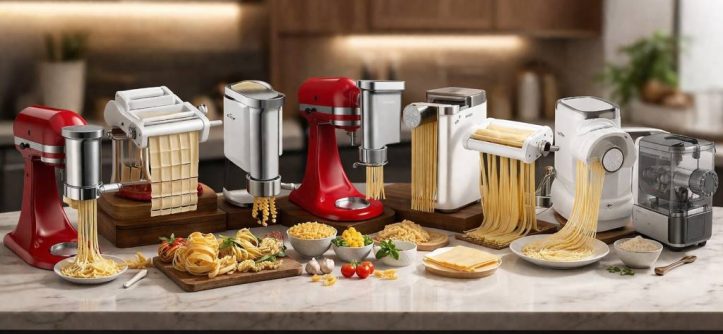
California’s fresh ingredient culture demands versatile kitchen tools for authentic homemade pasta. A quality 3-in-1 pasta maker transforms fresh dough into various pasta shapes with ease. It elevates your cooking experience from ordinary to restaurant-quality at home. The best Sailnovo
Archives
Best MARCATO Atlas 150 Classic Manual Pasta Maker in Illinois (IL): Everything You Need to Know Before Buying
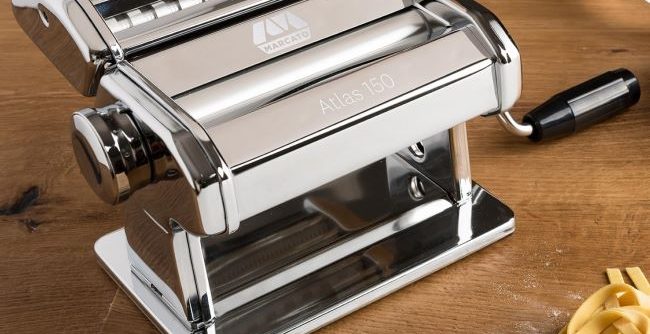
Illinois’s love for homemade pasta demands reliable kitchen tools for authentic results. A quality pasta maker transforms fresh ingredients into restaurant-quality noodles at home. It elevates your cooking experience from ordinary to extraordinary with minimal effort. The best MARCATO Atlas
How To Make Healthy Zucchini Pasta Using a Spiralizer Tool
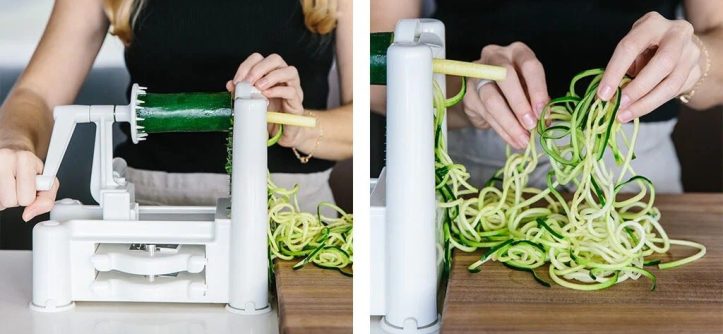
I still remember the first time I tried zucchini pasta. I was skeptical—how could a vegetable possibly replace my beloved spaghetti? But after one bite, I was hooked. The light, fresh flavor and satisfying texture made it an instant favorite.
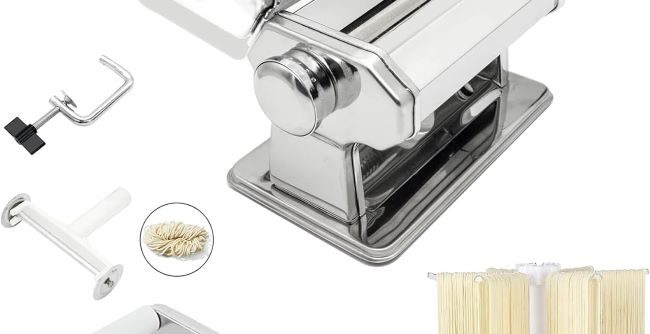
Maintain Manual Hand-Crank Pasta Makers
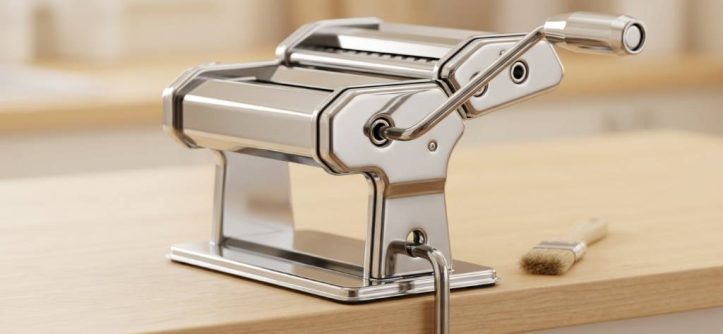
A well-maintained Manual Hand-Crank Pasta Maker lasts for decades. Over 60 percent of pasta maker owners report rust or squeaking within two years. Proper care prevents these issues and keeps your device running smoothly. Humidity and improper storage are the
Best Zucchini Pasta Makers in Florida (FL) – Which Spiralizer Creates Better Veggie Pasta?
The demand for healthy, low-carb alternatives to traditional pasta has skyrocketed in recent years. Zucchini pasta, or “zoodles,” offers a nutritious and delicious substitute for those looking to cut carbs or add more vegetables to their diet. Florida, with its
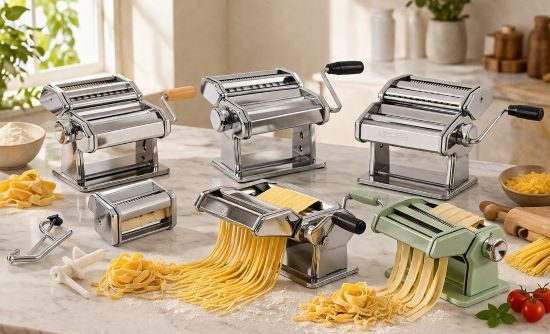
How To Use a Manual Pasta Machine Like a Professional Chef

The aroma of fresh pasta dough filling the kitchen is one of life’s simple pleasures. There’s something magical about transforming a few basic ingredients into silky, golden sheets ready to be cut into fettuccine, tagliatelle, or ravioli. While stand mixers
Affordable Fully Automatic Electric Pasta Makers in California: Latest Buyer’s Guide
Making fresh pasta at home has shifted from a niche hobby to a practical kitchen upgrade. According to data from the USDA, home cooking frequency in the U.S. increased by over 20 percent in recent years, with more households investing
Best Manual Hand-Crank Pasta Makers in New York: 2026 Buyer’s Guide
Fresh pasta has quietly made its way back into home kitchens across New York. More people now prefer making pasta from scratch, not just for taste but for control over ingredients. According to data from the United States Department of
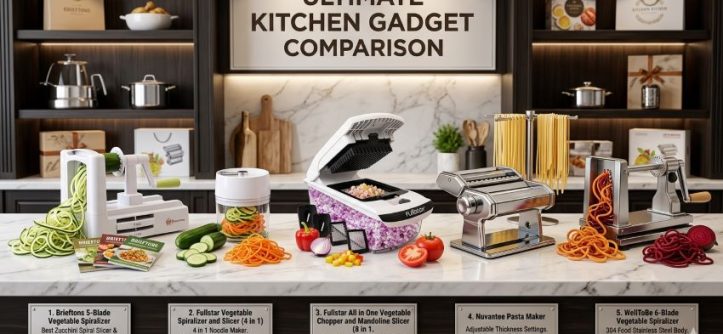
5 Best Pasta Maker Reviews 2026 — Ultimate Comparison and Buying Guide

Top Pasta Makers — At a Glance (2026) Product Type Best For Key Feature 1. Newhai Commercial Electric Pasta Maker Electric Large batches / Heavy use 550W motor & heavy-duty design 2. NEWTRY Electric Pasta Maker Family Noodle Machine Electric
Transform Your Kitchen with the MZTOGR 2-in-1 Pasta And Noodle Maker: The Game-Changing Solution for Home Cooks
Imagine pulling restaurant-quality pasta from your kitchen countertop every single week. The MZTOGR 2-in-1 Pasta & Noodle Maker delivers exactly that experience. This innovative kitchen device revolutionizes how home cooks approach homemade noodles and pasta. According to recent culinary surveys,