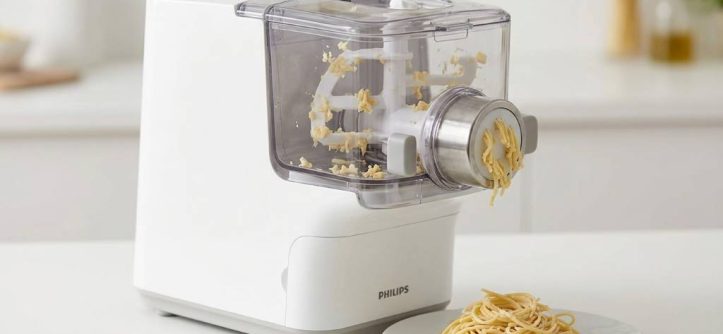
A fully automatic electric pasta makers can transform your kitchen into a pasta paradise. Yet, many users struggle with clogged dough, which ruins the experience. Studies show that 70 percent of pasta maker issues stem from improper cleaning. Regular maintenance ensures smooth operation and extends the appliance’s life.
Clogged dough not only wastes ingredients but also damages the machine over time. Learning to clean your pasta maker properly saves money and frustration. This guide will walk you through the process step by step. You will also discover unique tips to keep your machine in top shape.
Understanding the Problem of Clogged Dough
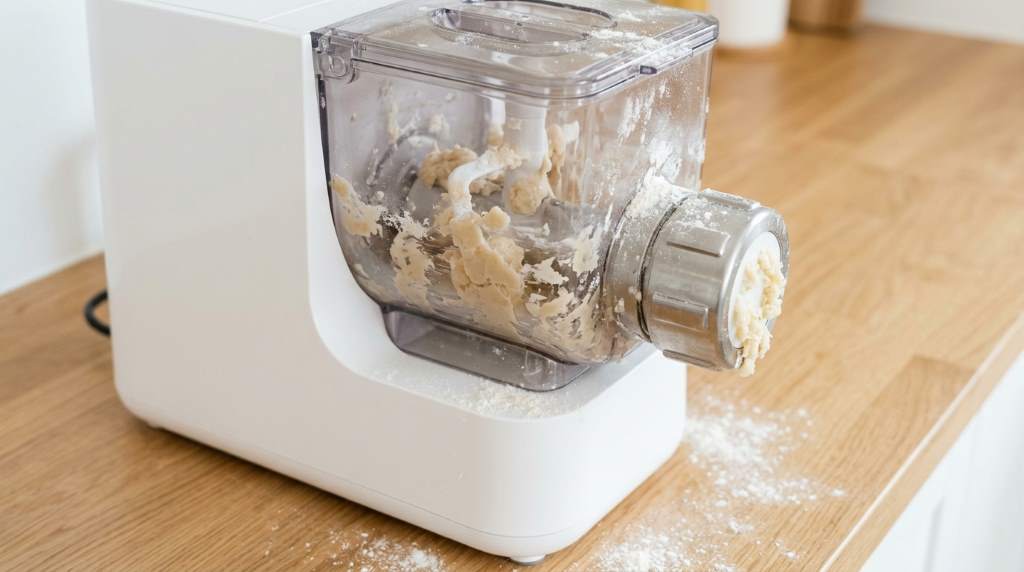
Clogged dough happens when leftover pasta mixture dries inside the machine. This buildup blocks the rollers and cutters, causing jams. Humid climates, like those in coastal areas, worsen this issue. Dough absorbs moisture from the air, making it stickier and harder to remove.
The extruder and cutting blades are the most vulnerable parts. Even small amounts of dried dough can disrupt the entire process. Regular cleaning prevents these blockages from forming. It also ensures your pasta comes out perfectly every time.
Ignoring this problem leads to costly repairs or replacements. A well maintained pasta maker lasts for years. Cleaning after each use is the best way to avoid clogs. This habit also improves the taste and texture of your pasta.
Why Cleaning Your Pasta Maker Matters
Cleaning your pasta maker removes food residue that attracts bacteria. This keeps your kitchen hygienic and your food safe. Dried dough can also harbor mold, which is harmful if ingested. Regular cleaning eliminates this risk.
A clean machine operates more efficiently and uses less energy. It also produces better quality pasta with consistent thickness. This is especially important for professional chefs. Home cooks benefit from smoother and more reliable performance.
Proper maintenance preserves the machine’s moving parts. Lubrication and cleaning prevent wear and tear. This extends the lifespan of your appliance significantly. It also saves you from the hassle of frequent repairs.
Tools and Materials You Will Need
Gather soft brushes, like pastry or toothbrushes, to reach tight spaces. Microfiber cloths are gentle on surfaces and absorb moisture well. A plastic scraper helps remove stubborn dough without scratching. Avoid metal tools as they can damage the machine.
Mild dish soap and warm water are essential for cleaning. Vinegar or baking soda can tackle tough stains and odors. A small spray bottle makes it easier to apply cleaning solutions. Always dry the parts thoroughly after washing.
Check your pasta maker’s manual for specific recommendations. Some models may require special cleaners or tools. Using the wrong products can void your warranty. Stick to manufacturer approved methods for best results.
Step by Step Cleaning Process
Unplug and Disassemble the Machine
Always unplug the pasta maker before cleaning to avoid accidents. Remove all detachable parts, such as rollers, cutters, and trays. Lay them out on a clean surface for easy access. This makes cleaning more thorough and efficient.
Refer to the user manual for disassembly instructions. Some parts may require gentle force to detach. Keep track of screws and small components to avoid losing them. Organize parts in the order they were removed.
Remove Excess Dough and Debris
Use a plastic scraper to gently remove dried dough from the rollers and blades. Be careful not to scratch the non stick surfaces. A soft brush can reach crevices where dough accumulates. Work methodically to cover all areas.
Pay special attention to the extrusion chamber and feeding tube. These areas often trap dough and cause clogs. Remove all visible debris before moving to the next step. This prevents residue from hardening and becoming harder to clean.
Wash Detachable Parts
Fill a sink or basin with warm, soapy water. Soak the detachable parts for 10 to 15 minutes to loosen dried dough. Use a soft brush or cloth to scrub each part gently. Rinse thoroughly with clean water.
For stubborn stains, use a paste of baking soda and water. Apply it to the affected areas and let it sit for a few minutes. Scrub gently and rinse well. Avoid abrasive cleaners that can damage the surfaces.
Clean the Main Unit
Wipe the main unit with a damp microfiber cloth. Avoid using excessive water, as it can damage electrical components. For sticky residue, use a cloth dampened with vinegar or mild cleaner. Dry the unit immediately with a clean towel.
Use a soft brush to clean the rollers and blades in place. Rotate the rollers manually to access all sides. Be gentle to avoid bending or damaging the blades. Never immerse the main unit in water.
Dry and Reassemble the Pasta Maker
Dry all parts thoroughly with a clean towel or air dry them. Ensure no moisture remains in any crevices. Reassemble the pasta maker according to the manual. Double check that all parts are secure and properly aligned.
Plug in the machine and run a test cycle with plain flour. This helps remove any remaining residue. Discard the test dough and wipe the machine again if needed. Your pasta maker is now ready for the next use.
Unique Tips for Preventing Clogged Dough
Use a small amount of cornstarch on the rollers before each use. This prevents dough from sticking and makes cleaning easier. Cornstarch is a natural anti sticking agent. It is safe for consumption and does not affect the pasta’s taste.
Avoid overloading the pasta maker with too much dough at once. Follow the manufacturer’s guidelines for dough quantity. Smaller batches reduce the risk of clogs and jams. They also ensure even extrusion and better pasta quality.
Store your pasta maker in a dry, cool place when not in use. Use a dust cover to protect it from environmental debris. This prevents dust and moisture from accumulating inside. Regular use also keeps the machine in good working condition.
Consider using a food safe lubricant on the moving parts occasionally. This reduces friction and wear, making the machine run smoother. Check the manual for recommended lubricants. Apply sparingly to avoid contamination.
Cleaning Frequency and Maintenance Schedule
Clean your pasta maker after every use to prevent dough buildup. This is the most effective way to avoid clogs. Even if the machine looks clean, residual dough can harden over time. A quick clean takes only a few minutes.
Perform a deep clean at least once a month. This involves disassembling and cleaning all parts thoroughly. Check for wear and tear during this process. Replace any damaged or worn out parts promptly.
Keep a cleaning log to track maintenance tasks. Note the date and type of cleaning performed. This helps you stay on top of regular upkeep. It also serves as a reminder for future maintenance.
Common Mistakes to Avoid
Never use harsh chemicals or abrasive cleaners on your pasta maker. These can damage the surfaces and leave harmful residues. Stick to mild, food safe cleaning agents. Always rinse parts thoroughly after cleaning.
Avoid soaking the main unit or electrical parts in water. This can cause electrical shorts or damage. Wipe these areas with a damp cloth instead. Dry them immediately to prevent moisture damage.
Do not use metal utensils or sharp objects to scrape off dough. These can scratch or dent the machine’s parts. Opt for plastic or wooden tools instead. Handle all parts with care to avoid bending or breaking them.
Skipping the drying step is a common mistake. Moisture left on parts can lead to mold or rust. Always dry all components thoroughly before reassembling. Store the machine in a dry place to prevent moisture buildup.
Troubleshooting Clogged Dough Issues
If your pasta maker jams, stop the machine immediately. Unplug it and remove any visible dough causing the blockage. Use a soft brush or plastic scraper to clear the area. Avoid forcing the machine to run.
Check the dough consistency if clogs happen frequently. Too sticky or dry dough can cause issues. Adjust your recipe to achieve the right texture. Follow the manufacturer’s recommendations for dough preparation.
Inspect the rollers and blades for damage or wear. Bent or dull blades can cause uneven extrusion and clogs. Replace any damaged parts as needed. Regular maintenance prevents these issues from occurring.
Ensure all parts are properly assembled before use. Misaligned rollers or cutters can cause jams. Refer to the manual for correct assembly instructions. Double check connections and alignments.
Climate Specific Tips for Pasta Maker Care
In humid climates, dough tends to absorb more moisture from the air. Use slightly less water in your recipe to compensate. Store flour and dough ingredients in airtight containers. This prevents them from absorbing excess moisture.
Dry climates can cause dough to dry out quickly. Keep the pasta maker and dough covered during use. Use a damp cloth to cover the machine between batches. This maintains the right moisture level for smooth operation.
Extreme temperatures can affect the machine’s performance. Avoid using the pasta maker in very hot or cold environments. Store it in a temperature controlled space. This ensures consistent performance and longevity.
Dust and debris are common in windy areas. Cover your pasta maker when not in use. Clean it more frequently to remove dust buildup. This prevents particles from mixing with dough and causing clogs.
Conclusion
Cleaning your fully automatic electric pasta maker is essential for its performance. Regular maintenance prevents clogged dough and extends the machine’s life. Follow the steps and tips provided to keep your appliance in top condition.
Investing time in proper cleaning saves you from costly repairs. It also ensures delicious, high quality pasta every time. Make cleaning a habit after each use. Your pasta maker will reward you with years of reliable service.
Share these tips with fellow pasta lovers to spread the knowledge. Happy pasta making and enjoy the fruits of your clean machine. Start implementing these practices today for the best results.
FAQ
How often should I clean my pasta maker?
Clean your pasta maker after every use to prevent dough buildup and clogs.
Can I use a dishwasher to clean the parts?
Check the manual first, but most detachable parts are dishwasher safe on the top rack.
What is the best way to remove dried dough?
Soak the parts in warm, soapy water and use a soft brush to gently scrub off the dough.
Why does my pasta maker keep clogging?
Clogging often occurs due to improper cleaning, wrong dough consistency, or overloading the machine.
Is it safe to use vinegar for cleaning?
Yes, vinegar is safe and effective for removing residue and odors from your pasta maker.


Leave a Reply