For a small batch in the Philips Pasta Maker, use one cup of flour; for a large batch, use two cups. Crafting homemade pasta with the Philips Pasta Maker is a breeze, providing a quick and efficient way to enjoy fresh pasta at home.
This innovative appliance simplifies the pasta-making process, allowing even novice chefs to produce restaurant-quality noodles in minutes. The machine’s precision ensures the perfect flour-to-liquid ratio, vital for achieving the ideal pasta texture. Users appreciate the convenience of the pre-measured flour cups and water lines, which take the guesswork out of creating dough.
Whether you’re a pasta enthusiast or just looking for a way to elevate your home-cooked meals, the Philips Pasta Maker is your go-to kitchen gadget for fresh, delicious pasta every time.

The Perfect Portion
Understanding ‘The Perfect Portion’ ensures your homemade pasta turns out just right using the Philips Pasta Maker. Knowing exactly how much flour to use can make or break your pasta experience. This guide simplifies the measurements and differences between small and large batches, so you achieve perfect pasta every time.
Ideal Ratios For Flawless Pasta
Every pasta batch starts with the right ratios. For Philips Pasta Maker:
- 1 cup of flour for every 1 egg and 1/2 cup of water is perfect for small batches.
- For larger gatherings, use 2 eggs and 1 cup of water with 2 cups of flour.
This ratio ensures the pasta dough is neither too dry nor too sticky, providing the ideal texture for extrusion.
Small Vs Large Batch Differences
Adjusting your recipe according to batch size is crucial:
| Batch Size | Flour (cups) | Eggs | Water (cups) |
|---|---|---|---|
| Small | 1 | 1 | 0.5 |
| Large | 2 | 2 | 1 |
Small batches are quick and ideal for personal meals. Large batches suit family dinners or meal prepping for future use. Always measure ingredients precisely to maintain quality.
By following these simple guidelines, your homemade pasta will always come out delicious and perfectly textured. Enjoy crafting various pasta shapes and sizes with your Philips Pasta Maker!

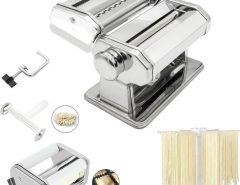
Machine Essentials
Welcome to the world of homemade pasta with your Philips Pasta Maker! This magical machine takes the guesswork out of pasta-making. But, before you start, knowing the right amount of flour is key. Let’s dive into the ‘Machine Essentials’ to make perfect pasta every time.
Understanding Capacity
The Philips Pasta Maker is designed for ease and efficiency. It can handle a specific quantity of ingredients for optimal performance. Exceeding this capacity may cause the machine to work improperly. Always refer to your user manual for the exact capacity of your model.
Tip: Stick to the recommended flour capacity to avoid spilling or jamming.
Measuring Cup Sizes
Philips provides measuring cups tailored to the pasta maker. These cups ensure you use the precise amount of flour needed for your pasta. Using different cups might lead to inconsistent results.
| Pasta Type | Flour (Cups) | Water/Eggs |
|---|---|---|
| Small Batch | 1 | 1 egg + ½ cup water |
| Large Batch | 2 | 2 eggs + water as needed |
Remember, the cup provided by Philips is the only cup you should use. Do not use standard kitchen measuring cups.
Note: Always level off the flour in the measuring cup for accurate measurements.

Flour Fundamentals
Understanding the right flour to use in your Philips Pasta Maker is key. It can mean the difference between good and great pasta. Let’s dive into the types of flour you can use and how to adjust for different conditions.
Types Of Flour To Use
Every pasta dish starts with the right flour. Here are some common choices:
- All-purpose flour: Versatile and easy to find.
- Semolina flour: Gives pasta a classic texture and taste.
- Whole wheat flour: For a healthier option.
Each flour affects your pasta’s texture and flavor. Choose based on your taste preference and dietary needs.
Adjusting For Humidity And Altitude
Your environment impacts how much flour you should use:
| Condition | Adjustment |
|---|---|
| High Humidity | Use less water or more flour. |
| High Altitude | Use more water and less flour. |
Keep these tips in mind to make perfect pasta every time with your Philips Pasta Maker.
Liquid Measurements
Getting the liquid measurements right is crucial for perfect pasta from your Philips Pasta Maker. Too little liquid? Your pasta could turn out dry and crumbly. Too much? You might end up with a sticky mess. Follow these guidelines to ensure your pasta is smooth and delicious.
Egg And Water Proportions
For a single batch in the Philips Pasta Maker, you generally need one egg and a half cup of water. If you’re making a double batch, use two eggs and scale up the water accordingly. The key is to balance the egg and water ratio for the flour amount. Here’s a quick guide:
- 1 egg + 1/2 cup water for every 1 cup of flour (single batch)
- 2 eggs + 1 cup water for every 2 cups of flour (double batch)
Using The Water Markings
Your Philips Pasta Maker comes with handy water markings on the mixing chamber. These indicate exactly how much liquid you need for the flour you’ve added. Just crack your eggs into the chamber and fill with water up to the corresponding line. Here’s what to look for:
| Flour Amount | Water Marking |
|---|---|
| 1 cup | Use the 1-egg line |
| 2 cups | Use the 2-egg line |
Remember to use room temperature water to achieve the best consistency in your pasta dough.
Batch Calculations
Creating the perfect pasta with your Philips Pasta Maker is all about precision. Knowing the right amount of flour for each batch ensures delicious, homemade pasta every time. Let’s dive into the specifics of batch calculations.
Flour Per Person For Pasta
When planning a pasta meal, it’s crucial to know how much flour each person needs. A general rule is:
- 100 grams of flour per person for a generous serving.
- 80 grams for a lighter meal.
This translates to roughly 3/4 cup to 1 cup of flour per person.
Scaling Up Recipes
If you’re hosting a dinner party or meal prepping for the week, scaling up your pasta recipe is a must. Use these tips:
- Multiply the flour per person by the number of servings.
- Remember, each egg typically binds up to 150 grams of flour.
- Adjust liquid ingredients proportionally to maintain consistency.
Here’s a quick table to help you scale up:
| Servings | Flour (cups) | Eggs | Water (tbsp) |
|---|---|---|---|
| 1 | 3/4 – 1 | 1 | 2 |
| 2 | 1 1/2 – 2 | 2 | 4 |
| 4 | 3 – 4 | 4 | 8 |
Fixing The Dough
Creating the perfect pasta dough with your Philips Pasta Maker is crucial for delicious homemade pasta. Sometimes, the dough might not turn out as expected. Don’t worry! Fixing the dough is simple and ensures your pasta comes out just right.
Correcting Too Much Flour
If your dough feels dry and crumbly, you’ve likely added too much flour. But fear not; it’s an easy fix. Start by adding water, one teaspoon at a time. Run the pasta maker again until the dough reaches a smooth and pliable consistency.
- Check the dough after each teaspoon of water.
- Be patient—it may take a few tries to get it right.
- Avoid adding too much water, as it can make the dough sticky.
Achieving The Right Consistency
The key to perfect pasta dough is the right balance of ingredients. Here’s a simple guide to help you achieve that:
| Consistency | Action |
|---|---|
| Too Dry | Add water, teaspoon by teaspoon. |
| Too Wet | Add flour, tablespoon by tablespoon. |
| Just Right | Should be tacky, not sticky, and form a ball. |
Remember to let the dough rest for a few minutes after adjusting. This allows the flour to fully absorb the added water or flour, leading to even consistency.
Flavor Variations
Using the Philips Pasta Maker opens a world of flavor possibilities. Beyond traditional pasta dough, adding various ingredients can transform your homemade pasta into a gourmet experience.
Incorporating Spinach And Other Add-ins
Adding spinach to your pasta dough is a simple way to add color and nutrients. To do this, blend fresh spinach leaves into a puree. Strain to remove excess moisture. Mix this puree with your flour and eggs.
- Use one cup of spinach for every two cups of flour for a subtle flavor.
- For a stronger spinach taste, increase the amount accordingly.
Other popular add-ins include:
| Add-in | Quantity per 2 cups of Flour |
|---|---|
| Pureed Beets | 1/3 cup |
| Herbs (Basil, Oregano) | 2 tbsp, chopped |
| Tomato Paste | 2 tbsp |
Experimenting With Flavors
Creating unique pasta flavors is easy with the Philips Pasta Maker. Consider these ingredients:
- Spices: Add a teaspoon of paprika or turmeric for a vibrant hue and taste.
- Infused Oils: Use garlic or chili-infused oil instead of regular oil for a kick.
- Citrus Zest: Lemon or orange zest brings freshness to the dough.
Remember, balance is key. Start with small quantities and adjust based on your taste.
Maintenance Tips
Keeping your Philips Pasta Maker in top condition ensures delicious homemade pasta every time. Follow these maintenance tips to extend the life of your machine and guarantee the best performance.
Cleaning After Use
Clean promptly after each use to prevent dough from hardening and sticking.
- Disassemble the removable parts.
- Rinse each piece under warm water.
- Use the provided cleaning tools to remove dough residue.
- Let all parts air-dry completely before reassembling.
Avoid using abrasive cleaners or scouring pads that can damage the surfaces.
Long-term Machine Care
Regular care keeps your pasta maker running smoothly for years.
- Store in a cool, dry place to prevent moisture buildup.
- Check for wear and tear on moving parts periodically.
- Apply a food-grade lubricant on moving parts if needed.
- Consult the manual for specific maintenance requirements.
Never immerse the main unit in water or place it in the dishwasher.
Advanced Techniques
Mastering the art of pasta making with the Philips Pasta Maker takes your culinary skills to new heights. It’s not just about the quantity of flour, but also the type of flour and pasta shapes you create. Let’s dive into advanced techniques that will elevate your homemade pasta.
Using Semolina Flour
Semolina flour is the secret ingredient for an authentic pasta texture. It’s made from durum wheat, which gives pasta the perfect bite. For your Philips Pasta Maker, mix semolina with all-purpose flour to strike a balance between texture and ease of extrusion.
- Start with a ratio of 1:1, semolina to all-purpose flour.
- Adjust the ratio based on the pasta’s firmness.
- Use the standard flour cup provided with your machine for accurate measurements.
Creating Artisan Pasta Shapes
Go beyond spaghetti and fettuccine. Experiment with artisan shapes like casarecce or orecchiette to impress your guests. These shapes may require hand shaping post-extrusion.
- Extrude a flat, wide shape like lasagna sheets.
- Cut into smaller pieces and shape with your fingers.
- Let shaped pasta dry slightly before cooking to maintain form.
Remember, practice makes perfect. Keep experimenting with your Philips Pasta Maker to discover new favorites.
Resource Toolkit
Mastering the Philips Pasta Maker is easier with the right resources. This toolkit guides you to the best sources for perfect pasta every time.
Recommended Recipe Books
Great pasta starts with great recipes. Here are top picks:
- “The Pasta Maker Cookbook” by Maria Tucci: Includes precise flour measurements for different pasta types.
- “Fresh Pasta at Home” by Lisa Moretti: Offers step-by-step guides suitable for beginners.
These books ensure you use the right amount of flour and more for delicious results.
Online Tutorials And Communities
Learning online is fun and easy. Check these out:
- YouTube Channel – Pasta Magic: Watch detailed video tutorials about using the Philips Pasta Maker.
- Facebook Group – Home Pasta Makers: Join to share experiences and get tips from other pasta enthusiasts.
These online platforms are great for both new and seasoned pasta makers.
Frequently Asked Questions
What Are The Ratios For The Philips Pasta Machine?
The Philips pasta machine offers two ratio settings: for a small batch, use one egg, half a cup of water, and one cup of flour. For a large batch, use two eggs, one cup of water, and two cups of flour.
How Big Is The Philips Pasta Maker Flour Cup?
The Philips pasta maker flour cup has a capacity of one cup or approximately 250 grams.
How Many Cups Of Flour Per Person For Pasta?
For homemade pasta, use approximately 1/2 cup of flour per person.
Can You Add Too Much Flour To Pasta Dough?
Yes, adding too much flour to pasta dough can result in a dry, crumbly texture. To fix it, gradually mix in small amounts of water until the desired consistency is achieved.
Conclusion
Nailing the perfect flour amount for your Philips Pasta Maker is key for delicious, homemade pasta. This post has guided you through the specifics, ensuring you achieve that ideal dough consistency every time. Remember, precision and a touch of patience are your best friends in pasta making.
With the tips shared, you’re now well-equipped to create mouth-watering pasta that’s sure to impress. Keep experimenting, and enjoy the fruits of your labor—plate after plate of fresh, delectable pasta.
Leave a Reply