
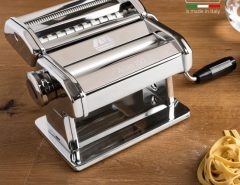
Picture this: you’re in the middle of making fresh, homemade pasta for a special dinner, and just as you’re rolling out that perfect dough, your pasta maker handle suddenly slips and spins freely. The frustration is real, and your pasta-making momentum comes to a screeching halt. If you’ve experienced this common kitchen nightmare, you’re not alone. A slipping pasta maker handle is one of the most frequent issues home cooks face with their manual pasta machines, but the good news is that most handle problems are completely fixable with the right approach.
Understanding Why Your Pasta Maker Handle Slips
Before diving into solutions, it’s crucial to understand what causes a pasta maker handle to slip in the first place. The handle mechanism in most manual pasta makers relies on a secure connection between the detachable crank handle and the machine’s gear system. When this connection becomes loose or worn, the handle loses its grip and begins to slip during operation.
Several factors contribute to handle slippage. Normal wear and tear from regular use gradually loosens the connection points. Food residue, particularly sticky pasta dough, can accumulate around the handle attachment area, preventing a secure fit. Additionally, improper storage or handling can cause the internal components to shift or become misaligned.
The type of pasta maker you own also influences handle stability. Traditional Italian-style machines with clamp-on handles tend to experience different issues than modern designs with integrated handle systems. Understanding your specific machine’s design helps target the most effective repair approach.

Essential Tools and Materials for Handle Repair
Successfully fixing a slipping pasta maker handle requires having the right tools and materials on hand. Most repairs can be completed with basic household items, making this a cost-effective solution compared to purchasing a replacement machine.
You’ll need a clean, lint-free cloth for thorough cleaning, warm soapy water for removing food residue, and a small brush or toothbrush for detailed cleaning around tight spaces. For mechanical adjustments, gather a set of small screwdrivers, including both flathead and Phillips head varieties. Needle-nose pliers can be helpful for gripping small components.
Keep food-safe lubricant or mineral oil available for lubricating moving parts. Some repairs may require rubber washers or O-rings if the original seals are damaged. Having a magnifying glass can help identify small worn components that might need attention.
Step-by-Step Cleaning and Maintenance Solution
The most common cause of handle slippage is accumulated food debris interfering with the connection mechanism. Start by completely disassembling the removable parts of your pasta maker, including the handle, rollers, and any detachable components.
Clean each component thoroughly with warm, soapy water, paying special attention to the handle attachment point and the corresponding socket on the machine. Use a small brush to remove dried dough particles from crevices and threads. Rinse everything completely and dry thoroughly before reassembly.
Inspect the handle attachment area for any visible damage, wear, or deformation. Look for stripped threads, worn surfaces, or bent components that might prevent a secure connection. Clean the internal mechanism where the handle connects, removing any grease buildup or food particles that could cause slippage.
Apply a small amount of food-safe lubricant to the moving parts, but avoid over-lubricating as this can attract more debris. Reassemble the components carefully, ensuring everything fits snugly and operates smoothly.
Tightening and Adjusting the Handle Connection
If cleaning doesn’t resolve the slipping issue, the handle connection may need mechanical adjustment. Most pasta maker handles secure through either a threaded connection, a spring-loaded mechanism, or a clamp-style attachment.
For threaded connections, examine the threads on both the handle and the machine socket. If they appear worn but not completely stripped, try tightening the connection while applying gentle pressure to ensure proper engagement. Sometimes the handle simply needs to be screwed in more firmly.
Spring-loaded mechanisms may require adjustment of the internal spring tension. Carefully disassemble the handle assembly and inspect the spring for proper positioning and tension. A weakened spring might need replacement, while a displaced spring may just need repositioning.
Clamp-style attachments should be examined for proper alignment and tightness. Adjust the clamp mechanism to ensure it grips the machine’s drive shaft securely without being overly tight, which could cause premature wear.
Replacing Worn Components
When cleaning and adjustment don’t solve the problem, component replacement may be necessary. Common parts that wear out include rubber washers, O-rings, springs, and sometimes the handle itself.
Contact the manufacturer to source genuine replacement parts when possible. Many pasta maker companies offer replacement handles and internal components, often at a fraction of the cost of a new machine. Provide your machine’s model number and a clear description of the problem when requesting parts.
If manufacturer parts aren’t available, hardware stores often carry universal components that can work as substitutes. Bring the worn part with you to ensure proper sizing and compatibility.
When installing new components, follow the manufacturer’s instructions carefully. Take photos during disassembly to reference during reassembly, and work slowly to avoid forcing parts that don’t fit naturally.
Preventing Future Handle Problems
Prevention is always better than repair when it comes to pasta maker maintenance. Establish a regular cleaning routine after each use, ensuring all dough residue is removed before it can harden and interfere with moving parts.
Store your pasta maker in a dry location to prevent moisture-related corrosion or component swelling. If your machine has a removable handle, store it separately to prevent stress on the connection point.
Use appropriate force when operating your pasta maker. Excessive pressure when cranking the handle can accelerate wear on connection points and internal mechanisms. Let the machine do the work rather than forcing thick dough through the rollers.
Consider the type of dough you’re making. Extremely sticky or wet doughs can cause more residue buildup, while overly dry doughs may require more force to process. Adjust your dough consistency to work optimally with your machine’s capabilities.
When to Seek Professional Help or Consider Replacement
While many handle slipping issues can be resolved with DIY repairs, some situations warrant professional attention or machine replacement. If your pasta maker’s main gear system is damaged, professional repair may be more cost-effective than attempting the fix yourself.
Machines with extensive wear across multiple components, particularly if they’re older models, might not be worth the investment in multiple replacement parts. Compare repair costs against the price of a new pasta maker to make an informed decision.
Safety should always be your primary concern. If any repair attempts result in unstable operation or if you notice cracks in metal components, discontinue use immediately and consult a professional.
Read More Also: How to Use a Pasta Maker: Step-by-Step for Perfect Homemade Pasta
Frequently Asked Questions
Q: Why does my pasta maker handle keep slipping even after cleaning?
A: Persistent slipping after cleaning typically indicates worn connection threads or damaged internal components that need replacement rather than just maintenance.
Q: Can I use regular household lubricants on my pasta maker?
A: Only use food-safe lubricants specifically designed for kitchen equipment. Regular household oils can become rancid and affect food safety.
Q: How often should I perform maintenance on my pasta maker?
A: Clean your pasta maker after every use and perform deeper maintenance monthly if you use it regularly, or seasonally for occasional users.
Q: Is it worth repairing an old pasta maker or should I buy a new one?
A: If repair costs exceed 50% of a new machine’s price, or if multiple major components need replacement, purchasing a new pasta maker is usually more economical.
Q: Can I prevent my pasta maker handle from slipping in the future?
A: Yes, regular cleaning, proper storage, using appropriate force when operating, and avoiding overly sticky doughs can significantly reduce handle slipping issues.
Read More Also: Stainless Steel or Plastic? Choosing the Right Build for Your Pasta Maker
Take Action and Get Back to Making Perfect Pasta
Don’t let a slipping handle keep you from enjoying homemade pasta. Start with the cleaning and maintenance steps outlined above, as these resolve the majority of handle issues. If your pasta maker needs more extensive repairs, remember that investing in proper maintenance extends your machine’s life and ensures consistently excellent pasta-making results.
Ready to fix your pasta maker and get back to creating delicious homemade pasta? Begin with a thorough cleaning today, and share your success story in the comments below. For more pasta-making tips and kitchen equipment maintenance guides, subscribe to our newsletter and never miss an update that could save you time and money in the kitchen.

Leave a Reply